> ## Documentation Index
> Fetch the complete documentation index at: https://gcore-doc-1046.mintlify.site/llms.txt
> Use this file to discover all available pages before exploring further.
# Customize the initial setup for your Virtual Machine
## Why automate the initial setup?
Automating the initial setup saves time and effort, eliminates manual tasks, reduces errors, ensures consistency, enables scalability, and allows you to focus on more valuable tasks. This is where the **User Data** field in the Virtual Machine setup page can assist you. By using the **User Data** field, you can:
* Set a password for a VM
* Create a user
* Configure groups
* Add an SSH key
* Add repositories and Install packages
* Write files
* Configure network interfaces
You can access and use the User Data field in three ways:
### From the customer portal
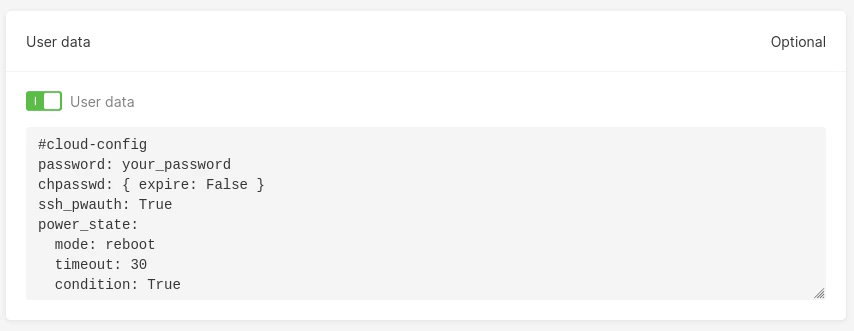
By default, the **User Data** field is disabled for new Virtual Machines (VMs). Enable it by switching on the toggle and adding your User Data content in the textbox.
 ### From Gcore's API
To add the User Data field when creating a new VM via [Gcore API](https://api.gcore.com/docs/cloud#tag/Instances/operation/InstanceCreateSetV2.post), provide your User Data content in `base64` format via `user_data` in the payload request.
Let's say you want to add the User Data field as below:
```yaml theme={null}
#cloud-config
password: your_password
chpasswd: { expire:False }
ssh_pwauth: True
power_state:
mode: reboot
timeout: 30
condition: True
```
First, you must encode this content in `base64` format. You can use the `base64` command line tool to do so.
```sh theme={null}
echo -n '#cloud-config
password: your_password
chpasswd: { expire:False }
ssh_pwauth: True
power_state:
mode: reboot
timeout: 30
condition: True' | base64
```
The encoded `base64` result should look similar to this:
```sh theme={null}
I2Nsb3VkLWNvbmZpZwpwYXNzd29yZDogeW91cl9wYXNzd29yZApjaHBhc3N3ZDogeyBleHBpcmU6RmFsc2UgfQpzc2hfcHdhdXRoOiBUcnVlCnBvd2VyX3N0YXRlOgogIG1vZGU6IHJlYm9vdAogIHRpbWVvdXQ6IDMwCiAgY29uZGl0aW9uOiBUcnVl
```
Then, make an API request with the `user_data` field provided in the payload to create a new VM:
```sh theme={null}
curl 'https://api.gcore.com/cloud/v2/instances/{projectId}/{regionId}'
...
\--data-raw {
"user_data":"I2Nsb3VkLWNvbmZpZwpwYXNzd29yZDogeW91cl9wYXNzd29yZApjaHBhc3N3ZDogeyBleHBpcmU6RmFsc2UgfQpzc2hfcHdhdXRoOiBUcnVlCnBvd2VyX3N0YXRlOgogIG1vZGU6IHJlYm9vdAogIHRpbWVvdXQ6IDMwCiAgY29uZGl0aW9uOiBUcnVl",...}
...
```
### From Terraform
A new Virtual Machine with the User Data field setup can also be created using [Terraform](https://registry.terraform.io/providers/G-Core/gcore/latest/docs/data-sources/instance). Encode your User Data field value to `base64` format first, then provide the encoded value to the `user_data` field in the Terraform definition file as below:
```
resource "gcore_instance" "instance" {
region_id = your_region_id
project_id = your_project_id
name = "your_instance_name"
...
user_data = "I2Nsb3VkLWNvbmZpZwpwYXNzd29yZDogeW91cl9wYXNzd29yZApjaHBhc3N3ZDogeyBleHBpcmU6RmFsc2UgfQpzc2hfcHdhdXRoOiBUcnVlCnBvd2VyX3N0YXRlOgogIG1vZGU6IHJlYm9vdAogIHRpbWVvdXQ6IDMwCiAgY29uZGl0aW9uOiBUcnVl"
...
}
```
The User Data field features were built based on `cloud-init`, an industry-standard multi-distribution method for cross-platform cloud VM initialization.
## What is cloud-init?
`Cloud-init` is an industry-standard software for automating the initialization of cloud Virtual Machines. You can use `cloud-init` to perform a number of initial tasks when your VM is booted for the first time, such as installing packages, running a shell script, or configuring the network interfaces.
`Cloud-init` supports all major Linux distributions:
* Alpine Linux
* ArchLinux
* Debian
* DragonFlyBSD
* Fedora
* FreeBSD
* Gentoo Linux
* NetBSD
* OpenBSD
* Photon OS
* RHEL/CentOS/AlmaLinux/Rocky Linux/EuroLinux
* SLES/openSUSE
* Ubuntu
It uses a YAML-based syntax, allowing the desired setup to be easily represented.
## Set a password for a Virtual Machine
By default, Gcore Virtual Machine does not allow SSH authentication using username and password alone; only machines with a matching SSH key are allowed to access the VM.
To override this default configuration, set `ssh_pwauth: True` in the **User Data** field. Below is an example configuration of how to set your Virtual Machine to be accessible using a default username and password.
```yaml theme={null}
#cloud-config
password: your_password
chpasswd: { expire: False }
ssh_pwauth: True
power_state:
mode: reboot
timeout: 30
condition: True
```
* The `password` field sets the password value for your Virtual Machine's default username. Depending on the VM image, the username may vary. For example, if you create a Virtual Machine using the Ubuntu distro, your default username will be `ubuntu`
* With the `chpasswd: { expire: False }` configuration, you do not need to change the password of your default user after you access the VM
* `ssh_pwauth: True` allows your Virtual Machine to be accessible using a username and password
* The `power_state` block option tells `cloud-init` to wait 30 seconds for the `cloud-init` process to finish before shutting down the system
After the Virtual Machine is up and running, you can access the VM using the ssh command below:
```sh theme={null}
ssh your_default_username@your_instance_ip_address
```
Provide your password value; you should now be able to access the Virtual Machine.
## Create a user
With the **User data** field, you can create a new user in the Virtual Machine.
Let's say you want to create a user called `guest` with the same password as the first user. Here's the example of a `cloud-init` script for creating this `guest` user:
```yaml theme={null}
#cloud-config
...
#cloud-config
...
users:
- name: guest
sudo: ALL=(ALL) NOPASSWD:ALL
passwd: SHA-512_encrypted_value_of_guest_password
groups: users,admin
lock_passwd: false
shell: /bin/bash
power_state:
mode: reboot
timeout: 30
condition: True
```
Description of configuration parameters:
* `sudo`: Gives superuser rights to the guest user by setting the value `ALL=(ALL) NOPASSWD:ALL`.
* `passwd`: Provides an encrypted value of your password according to the SHA-512 encryption method. To generate the SHA-512 encrypted value, you can use the `mkpasswd` command line tool:
```sh theme={null}
mkpasswd -m sha512crypt guest
```
* `groups`: Lists all groups the `guest` user will belong to. In this configuration, the user will be automatically added to the `users` and `admin` groups. If you want to add the user to other groups, first [make sure that these groups exist](/cloud/virtual-instances/customize-initial-setup-for-your-instance#check-user-groups).
* `lock_passwd`: When set to `false`, this value allows you to access the Virtual Machine with a username and password.
* `shell`: When set to `bin/bash`, this value defines the default shell as `bash` for the `guest` user.
After you configure user data, wait a few minutes for your Virtual Machine to launch and use the `guest` user to access the VM:
1\. Run the following command: `ssh guest@your_instance_ip`.
2\. Type `guest` and press **Enter**.
You should now be able to log in to your guest user account.
**Info**
To check for the groups that the `guest` user belongs to, run the command `groups`. You should see the `users` and `admin` groups listed, indicating that the `guest` user belongs to the `users` and `admin` groups.
## Enable root user
When creating a Virtual Machine, you can enable user access to the root by adding the following line to the **User data** field:
```yaml theme={null}
#cloud-config
disable_root: false
```
For details on how to enable user access to root after creating a Virtual Machine, [read our guide](/cloud/virtual-instances/enable-root-user-on-a-linux-vm#enable-root-user-via-terminal).
## Configure user groups
You can also configure user groups, such as creating a new one. For example, you can create a new user group called `regular-users` by adding the below line to the **User Data** field:
```yaml theme={null}
#cloud-config
...
groups:
- regular-users
power_state:
mode: reboot
timeout: 30
condition: True
```
After your VM is ready, access it via ssh and run the following command to list all user groups in the system:
```sh theme={null}
compgen -g
```
The `regular-users` group should be displayed at the bottom of the result.
## Add an SSH key
There are times when you want your new Virtual Machine to be accessible from other machines. For example, some of your colleagues may also want to use your VM, or you might want to set up a cluster of Virtual Machines to create an Apache Hadoop or Apache Spark cluster. To do so, you need to add the public SSH keys of other machines to the **User Data** field.
Below is an example of how to add a public SSH key of another machine to the new Virtual Machine:
```yaml theme={null}
#cloud-config
...
ssh_authorized_keys:
- ssh-rsa AAAAB3NzaC1yc2EAAAADAQABAAABgQDLoSbgtCDju1vmEOws3cBpU5BDZJ3iwuHb0HnNaxJDDU72TYp4DZRxhkSy7KAGCnGl1x1et3i8TR9HeYLzF4B6+lBkHL3cfxuKqrTr7bYUNmmhxMj1THdH5lyS5ezYQGsd/QUryPNw9mbl1WrWu7sbyihF+B9+tHDoJ7owUehgHEG90XNJRFFe/ZHU+wHzJIRpQxFtdfZghwSBfRGJLTL6/nJtO39P7nAen48vH4iSzJYwsNtrWLG7Sr4kU6q8UJD+lCJ2IIumr6p66W9wh7IwgPED5ABQziSFCRXbeZIraaFvAhsV0r90u9t8cR8Yf2hU1rKcEaPRxYFC3IrrY94GnjTnzSE9p9a8DnF4G28/DHSMiTQd5yJKlED/n0piHMEMiJUpAruz3eHTqBz4T8taSZGuoqG4S6qrow6zigfesrWTmqegGUcQDdkTxj6DA5xtK2IIQSTsatQ9+7ggUIOFKGjoSKFxj2rJfxBjFS4pYFjOQBTdzz6ZCJjaMkhTXK8= account-name@hostname
```
Once the Virtual Machine is up and running, you can view the content of `authorized_keys` by running the below command:
```sh theme={null}
cat ~/.ssh/authorized_keys
```
You should see the configured ssh-rsa key listed in the result. The other machines should also be able to access this Virtual Machine via SSH.
## Add repositories and install packages
When using the Virtual Machine, the default installed packages are usually not sufficient for you to perform your tasks. For example, if you're a software engineer, you need to use docker to build the application image, or use `nmap` and `traceroute` to debug your application network.
Adding the below configuration into your **User Data** field helps you install the `docker`, `nmap`, and `traceroute` tools when the VM boots up.
```yaml theme={null}
#cloud-config
...
apt:
sources:
docker.list:
source: deb [arch=amd64] https://download.docker.com/linux/ubuntu $RELEASE stable
keyid: 9DC858229FC7DD38854AE2D88D81803C0EBFCD88
package_update: true
package_upgrade: true
packages:
- apt-transport-https
- ca-certificates
- gnupg-agent
- software-properties-common
- gnupg
- docker-ce
- docker-ce-cli
- nmap
- traceroute
power_state:
mode: reboot
timeout: 30
condition: True
```
With packages that are available in the default VM repository like `nmap` and `traceroute`, you only need to include them in the `packages` block. However, with packages that are **not** available in the default instance repository— like `docker-ce` and `docker-ce-cli`—you need to add the Docker repository first using `apt sources`.
After installing, restart the Virtual Machine so that these packages are added to the system path. Including the `power_state` block at the end of the **User Data** field is helpful because it allows you to use these tools as soon as the Virtual Machine is ready.
## Write files
Sometimes it may be helpful to have existing files for usage after the Virtual Machine is ready. For example, you could have a YAML file that contains example scripts for working with Docker. Using the feature below, you can create a file named `useful-docker-script.yaml` in the `/root` directory.
```yaml theme={null}
#cloud-config
...
write_files:
- path: /root/useful-docker-script.yaml
content: |
# This script is for building the
# docker Image in order to push it later to your DockerHub
docker build -t dockerhub-username/docker-image-name .
# This script is for logging in to your DockerHub
docker login
# This script is for pushing the image to your DockerHub space
docker push dockerhub-username/docker-image-name
```
Access the Virtual Machine once it is available, and run the following command to check whether the new file `useful-docker-script.yaml` has been created:
```sh theme={null}
cd /root
ls
```
You should see a result similar to the below:
```sh theme={null}
useful-docker-script.yaml
```
Run the following command to view the content of the file `useful-docker-script.yaml`.
```sh theme={null}
cat useful-docker-script.yaml
```
You should see a similar output to this:
```sh theme={null}
# This script is for building the
# docker Image in order to push it later to your DockerHub
docker build -t dockerhub-username/docker-image-name .
# This script is for logging in to your DockerHub
docker login
# This script is for pushing the image to your DockerHub space
docker push dockerhub-username/docker-image-name
```
## Configure network interfaces
You can also configure network interfaces using the **User Data** field. For example, you can add a static IP address to your Virtual Machine network interface. Having a static IP address offers benefits such as:
* Allowing you to host a web server using the static IP
* Allowing other Virtual Machines access to your VM reliably using the static IP
When your Virtual Machine is created, `cloud-init` will generate a new file named `50-cloud-init.yaml` in the `/etc/netplan` directory and create a new network interface based on that file. To add a static IP address to the network interface, you need to create another file in the `/etc/netplan` other than `50-cloud-init.yaml`. When `cloud-init` creates the network interface, it will try to merge the content of these two configuration files. As a result, the static IP address will be added to the network interface. Below is an example content of the `50-cloud-init.yaml` file.
```yaml theme={null}
network:
version: 2
renderer: networkd
ethernets:
enp3s0:
dhcp4: true
match:
macaddress: fa:16:3e:1f:37:3c
mtu: 1500
set-name: enp3s0
```
To add a static IP to the `enp3s0` network interface, you can add the below content to the User Data field.
```yaml theme={null}
#cloud-config
...
write_files:
- content: |
network:
version: 2
renderer: networkd
ethernets:
enp3s0:
addresses:
- 192.170.1.25/24
- 2020:1::1/64
nameservers:
addresses:
- 8.8.8.8
- 8.8.4.4
path: /etc/netplan/00-add-static-ip.yaml
permissions: 0644
power_state:
mode: reboot
timeout: 30
condition: True
```
`Cloud-init` will execute two steps based on this configuration.
* First, `cloud-init` will create a new file named `00-add-static-ip.yaml` in `/etc/netplan` with instructions to add static IP addresses for both IPv4 (192.170.1.25) and IPv6 (2020:1::1.) The permission of the file is 0644, which means it is readable by any user and writable by `cloud-init`.
* When the Virtual Machine is rebooted (using the `power_state` block configuration), `cloud-init` will try to merge the network configuration for both `00-add-static-ip.yaml` and `50-cloud-init.yaml` files so that you can add static IP addresses to the `enp3s0` network interface.
Access the Virtual Machine once it is ready, and run the following command:
```sh theme={null}
ip a
```
You should see something similar to this:
```sh theme={null}
1: lo: mtu 65536 qdisc noqueue state UNKNOWN group default qlen 1000
link/loopback 00:00:00:00:00:00 brd 00:00:00:00:00:00
inet 127.0.0.1/8 scope host lo
valid_lft forever preferred_lft forever
inet6 ::1/128 scope host
valid_lft forever preferred_lft forever
2: enp3s0: mtu 1500 qdisc fq_codel state UP group default qlen 1000
link/ether fa:16:3e:6f:bc:a4 brd ff:ff:ff:ff:ff:ff
inet 192.170.1.25/24 brd 192.168.1.255 scope global enp3s0
valid_lft forever preferred_lft forever
inet 95.85.94.142/24 metric 100 brd 95.85.94.255 scope global dynamic enp3s0
valid_lft 86289sec preferred_lft 86289sec
inet6 2020:1::1/64 scope global
valid_lft forever preferred_lft forever
inet6 fe80::f816:3eff:fe6f:bca4/64 scope link
valid_lft forever preferred_lft forever
```
Notice in the enp3s0 interface, the static IP address for IPv4 is `192.170.1.25` and for IPv6 it is `2020:1::1`.
## Check Cloud-Init logs for errors
If you encounter any issues with `cloud-init`, you can check the logs to identify the problem. There are two main log files on your instances.
### Cloud-init log
The `cloud-init` log is located at `/var/log/cloud-init.log` and contains detailed information about the `cloud-init` process, including any errors that occur.
To view the `cloud-init` log, run the following command:
```sh theme={null}
cat /var/log/cloud-init.log
```
You should see the log output similar to this:
```sh theme={null}
2025-02-25 13:47:57,223 - util.py[DEBUG]: Cloud-init v. 24.4~3+really24.3.1-0ubuntu4 running 'init-local' at Tue, 25 Feb 2025 13:47:57 +0000. Up 10.68 seconds.
2025-02-25 13:47:57,227 - stages.py[DEBUG]: Using distro class
2025-02-25 13:47:57,228 - main.py[INFO]: PID [1] started cloud-init 'init-local'.
2025-02-25 13:47:57,228 - main.py[DEBUG]: No kernel command line url found.
2025-02-25 13:47:57,228 - main.py[DEBUG]: Closing stdin
2025-02-25 13:47:57,231 - util.py[DEBUG]: Writing to /var/log/cloud-init.log - ab: [640] 0 bytes
2025-02-25 13:47:57,232 - util.py[DEBUG]: Changing the ownership of /var/log/cloud-init.log to 102:4
2025-02-25 13:47:57,232 - util.py[DEBUG]: Writing to /var/lib/cloud/data/python-version - wb: [644] 4 bytes
2025-02-25 13:47:57,233 - util.py[DEBUG]: Attempting to remove /var/lib/cloud/instance/boot-finished
...
```
### Cloud-init output log
The `cloud-init-output` log is located at `/var/log/cloud-init-output.log` and contains the output of the scripts the `cloud-init` process runs.
To view the `cloud-init-output` log, run the following command:
```sh theme={null}
cat /var/log/cloud-init-output.log
```
You should see the log output similar to this:
```sh theme={null}
Cloud-init v. 24.4~3+really24.3.1-0ubuntu4 running 'init-local' at Tue, 25 Feb 2025 13:47:57 +0000. Up 10.68 seconds.
Cloud-init v. 24.4~3+really24.3.1-0ubuntu4 running 'init' at Tue, 25 Feb 2025 13:47:59 +0000. Up 13.00 seconds.
ci-info: +++++++++++++++++++++++++++++++++++++++Net device info+++++++++++++++++++++++++++++++++++++++
ci-info: +--------+------+------------------------------+---------------+--------+-------------------+
ci-info: | Device | Up | Address | Mask | Scope | Hw-Address |
ci-info: +--------+------+------------------------------+---------------+--------+-------------------+
ci-info: | enp3s0 | True | 11.222.111.222 | 255.255.255.0 | global | aa:bb:cc:dd:ee:ff |
ci-info: | enp3s0 | True | fe80::f816:3eff:fe25:e835/64 | . | link | aa:bb:cc:dd:ee:ff |
ci-info: | lo | True | 127.0.0.1 | 255.0.0.0 | host | . |
ci-info: | lo | True | ::1/128 | . | host | . |
...
```
### From Gcore's API
To add the User Data field when creating a new VM via [Gcore API](https://api.gcore.com/docs/cloud#tag/Instances/operation/InstanceCreateSetV2.post), provide your User Data content in `base64` format via `user_data` in the payload request.
Let's say you want to add the User Data field as below:
```yaml theme={null}
#cloud-config
password: your_password
chpasswd: { expire:False }
ssh_pwauth: True
power_state:
mode: reboot
timeout: 30
condition: True
```
First, you must encode this content in `base64` format. You can use the `base64` command line tool to do so.
```sh theme={null}
echo -n '#cloud-config
password: your_password
chpasswd: { expire:False }
ssh_pwauth: True
power_state:
mode: reboot
timeout: 30
condition: True' | base64
```
The encoded `base64` result should look similar to this:
```sh theme={null}
I2Nsb3VkLWNvbmZpZwpwYXNzd29yZDogeW91cl9wYXNzd29yZApjaHBhc3N3ZDogeyBleHBpcmU6RmFsc2UgfQpzc2hfcHdhdXRoOiBUcnVlCnBvd2VyX3N0YXRlOgogIG1vZGU6IHJlYm9vdAogIHRpbWVvdXQ6IDMwCiAgY29uZGl0aW9uOiBUcnVl
```
Then, make an API request with the `user_data` field provided in the payload to create a new VM:
```sh theme={null}
curl 'https://api.gcore.com/cloud/v2/instances/{projectId}/{regionId}'
...
\--data-raw {
"user_data":"I2Nsb3VkLWNvbmZpZwpwYXNzd29yZDogeW91cl9wYXNzd29yZApjaHBhc3N3ZDogeyBleHBpcmU6RmFsc2UgfQpzc2hfcHdhdXRoOiBUcnVlCnBvd2VyX3N0YXRlOgogIG1vZGU6IHJlYm9vdAogIHRpbWVvdXQ6IDMwCiAgY29uZGl0aW9uOiBUcnVl",...}
...
```
### From Terraform
A new Virtual Machine with the User Data field setup can also be created using [Terraform](https://registry.terraform.io/providers/G-Core/gcore/latest/docs/data-sources/instance). Encode your User Data field value to `base64` format first, then provide the encoded value to the `user_data` field in the Terraform definition file as below:
```
resource "gcore_instance" "instance" {
region_id = your_region_id
project_id = your_project_id
name = "your_instance_name"
...
user_data = "I2Nsb3VkLWNvbmZpZwpwYXNzd29yZDogeW91cl9wYXNzd29yZApjaHBhc3N3ZDogeyBleHBpcmU6RmFsc2UgfQpzc2hfcHdhdXRoOiBUcnVlCnBvd2VyX3N0YXRlOgogIG1vZGU6IHJlYm9vdAogIHRpbWVvdXQ6IDMwCiAgY29uZGl0aW9uOiBUcnVl"
...
}
```
The User Data field features were built based on `cloud-init`, an industry-standard multi-distribution method for cross-platform cloud VM initialization.
## What is cloud-init?
`Cloud-init` is an industry-standard software for automating the initialization of cloud Virtual Machines. You can use `cloud-init` to perform a number of initial tasks when your VM is booted for the first time, such as installing packages, running a shell script, or configuring the network interfaces.
`Cloud-init` supports all major Linux distributions:
* Alpine Linux
* ArchLinux
* Debian
* DragonFlyBSD
* Fedora
* FreeBSD
* Gentoo Linux
* NetBSD
* OpenBSD
* Photon OS
* RHEL/CentOS/AlmaLinux/Rocky Linux/EuroLinux
* SLES/openSUSE
* Ubuntu
It uses a YAML-based syntax, allowing the desired setup to be easily represented.
## Set a password for a Virtual Machine
By default, Gcore Virtual Machine does not allow SSH authentication using username and password alone; only machines with a matching SSH key are allowed to access the VM.
To override this default configuration, set `ssh_pwauth: True` in the **User Data** field. Below is an example configuration of how to set your Virtual Machine to be accessible using a default username and password.
```yaml theme={null}
#cloud-config
password: your_password
chpasswd: { expire: False }
ssh_pwauth: True
power_state:
mode: reboot
timeout: 30
condition: True
```
* The `password` field sets the password value for your Virtual Machine's default username. Depending on the VM image, the username may vary. For example, if you create a Virtual Machine using the Ubuntu distro, your default username will be `ubuntu`
* With the `chpasswd: { expire: False }` configuration, you do not need to change the password of your default user after you access the VM
* `ssh_pwauth: True` allows your Virtual Machine to be accessible using a username and password
* The `power_state` block option tells `cloud-init` to wait 30 seconds for the `cloud-init` process to finish before shutting down the system
After the Virtual Machine is up and running, you can access the VM using the ssh command below:
```sh theme={null}
ssh your_default_username@your_instance_ip_address
```
Provide your password value; you should now be able to access the Virtual Machine.
## Create a user
With the **User data** field, you can create a new user in the Virtual Machine.
Let's say you want to create a user called `guest` with the same password as the first user. Here's the example of a `cloud-init` script for creating this `guest` user:
```yaml theme={null}
#cloud-config
...
#cloud-config
...
users:
- name: guest
sudo: ALL=(ALL) NOPASSWD:ALL
passwd: SHA-512_encrypted_value_of_guest_password
groups: users,admin
lock_passwd: false
shell: /bin/bash
power_state:
mode: reboot
timeout: 30
condition: True
```
Description of configuration parameters:
* `sudo`: Gives superuser rights to the guest user by setting the value `ALL=(ALL) NOPASSWD:ALL`.
* `passwd`: Provides an encrypted value of your password according to the SHA-512 encryption method. To generate the SHA-512 encrypted value, you can use the `mkpasswd` command line tool:
```sh theme={null}
mkpasswd -m sha512crypt guest
```
* `groups`: Lists all groups the `guest` user will belong to. In this configuration, the user will be automatically added to the `users` and `admin` groups. If you want to add the user to other groups, first [make sure that these groups exist](/cloud/virtual-instances/customize-initial-setup-for-your-instance#check-user-groups).
* `lock_passwd`: When set to `false`, this value allows you to access the Virtual Machine with a username and password.
* `shell`: When set to `bin/bash`, this value defines the default shell as `bash` for the `guest` user.
After you configure user data, wait a few minutes for your Virtual Machine to launch and use the `guest` user to access the VM:
1\. Run the following command: `ssh guest@your_instance_ip`.
2\. Type `guest` and press **Enter**.
You should now be able to log in to your guest user account.
**Info**
To check for the groups that the `guest` user belongs to, run the command `groups`. You should see the `users` and `admin` groups listed, indicating that the `guest` user belongs to the `users` and `admin` groups.
## Enable root user
When creating a Virtual Machine, you can enable user access to the root by adding the following line to the **User data** field:
```yaml theme={null}
#cloud-config
disable_root: false
```
For details on how to enable user access to root after creating a Virtual Machine, [read our guide](/cloud/virtual-instances/enable-root-user-on-a-linux-vm#enable-root-user-via-terminal).
## Configure user groups
You can also configure user groups, such as creating a new one. For example, you can create a new user group called `regular-users` by adding the below line to the **User Data** field:
```yaml theme={null}
#cloud-config
...
groups:
- regular-users
power_state:
mode: reboot
timeout: 30
condition: True
```
After your VM is ready, access it via ssh and run the following command to list all user groups in the system:
```sh theme={null}
compgen -g
```
The `regular-users` group should be displayed at the bottom of the result.
## Add an SSH key
There are times when you want your new Virtual Machine to be accessible from other machines. For example, some of your colleagues may also want to use your VM, or you might want to set up a cluster of Virtual Machines to create an Apache Hadoop or Apache Spark cluster. To do so, you need to add the public SSH keys of other machines to the **User Data** field.
Below is an example of how to add a public SSH key of another machine to the new Virtual Machine:
```yaml theme={null}
#cloud-config
...
ssh_authorized_keys:
- ssh-rsa AAAAB3NzaC1yc2EAAAADAQABAAABgQDLoSbgtCDju1vmEOws3cBpU5BDZJ3iwuHb0HnNaxJDDU72TYp4DZRxhkSy7KAGCnGl1x1et3i8TR9HeYLzF4B6+lBkHL3cfxuKqrTr7bYUNmmhxMj1THdH5lyS5ezYQGsd/QUryPNw9mbl1WrWu7sbyihF+B9+tHDoJ7owUehgHEG90XNJRFFe/ZHU+wHzJIRpQxFtdfZghwSBfRGJLTL6/nJtO39P7nAen48vH4iSzJYwsNtrWLG7Sr4kU6q8UJD+lCJ2IIumr6p66W9wh7IwgPED5ABQziSFCRXbeZIraaFvAhsV0r90u9t8cR8Yf2hU1rKcEaPRxYFC3IrrY94GnjTnzSE9p9a8DnF4G28/DHSMiTQd5yJKlED/n0piHMEMiJUpAruz3eHTqBz4T8taSZGuoqG4S6qrow6zigfesrWTmqegGUcQDdkTxj6DA5xtK2IIQSTsatQ9+7ggUIOFKGjoSKFxj2rJfxBjFS4pYFjOQBTdzz6ZCJjaMkhTXK8= account-name@hostname
```
Once the Virtual Machine is up and running, you can view the content of `authorized_keys` by running the below command:
```sh theme={null}
cat ~/.ssh/authorized_keys
```
You should see the configured ssh-rsa key listed in the result. The other machines should also be able to access this Virtual Machine via SSH.
## Add repositories and install packages
When using the Virtual Machine, the default installed packages are usually not sufficient for you to perform your tasks. For example, if you're a software engineer, you need to use docker to build the application image, or use `nmap` and `traceroute` to debug your application network.
Adding the below configuration into your **User Data** field helps you install the `docker`, `nmap`, and `traceroute` tools when the VM boots up.
```yaml theme={null}
#cloud-config
...
apt:
sources:
docker.list:
source: deb [arch=amd64] https://download.docker.com/linux/ubuntu $RELEASE stable
keyid: 9DC858229FC7DD38854AE2D88D81803C0EBFCD88
package_update: true
package_upgrade: true
packages:
- apt-transport-https
- ca-certificates
- gnupg-agent
- software-properties-common
- gnupg
- docker-ce
- docker-ce-cli
- nmap
- traceroute
power_state:
mode: reboot
timeout: 30
condition: True
```
With packages that are available in the default VM repository like `nmap` and `traceroute`, you only need to include them in the `packages` block. However, with packages that are **not** available in the default instance repository— like `docker-ce` and `docker-ce-cli`—you need to add the Docker repository first using `apt sources`.
After installing, restart the Virtual Machine so that these packages are added to the system path. Including the `power_state` block at the end of the **User Data** field is helpful because it allows you to use these tools as soon as the Virtual Machine is ready.
## Write files
Sometimes it may be helpful to have existing files for usage after the Virtual Machine is ready. For example, you could have a YAML file that contains example scripts for working with Docker. Using the feature below, you can create a file named `useful-docker-script.yaml` in the `/root` directory.
```yaml theme={null}
#cloud-config
...
write_files:
- path: /root/useful-docker-script.yaml
content: |
# This script is for building the
# docker Image in order to push it later to your DockerHub
docker build -t dockerhub-username/docker-image-name .
# This script is for logging in to your DockerHub
docker login
# This script is for pushing the image to your DockerHub space
docker push dockerhub-username/docker-image-name
```
Access the Virtual Machine once it is available, and run the following command to check whether the new file `useful-docker-script.yaml` has been created:
```sh theme={null}
cd /root
ls
```
You should see a result similar to the below:
```sh theme={null}
useful-docker-script.yaml
```
Run the following command to view the content of the file `useful-docker-script.yaml`.
```sh theme={null}
cat useful-docker-script.yaml
```
You should see a similar output to this:
```sh theme={null}
# This script is for building the
# docker Image in order to push it later to your DockerHub
docker build -t dockerhub-username/docker-image-name .
# This script is for logging in to your DockerHub
docker login
# This script is for pushing the image to your DockerHub space
docker push dockerhub-username/docker-image-name
```
## Configure network interfaces
You can also configure network interfaces using the **User Data** field. For example, you can add a static IP address to your Virtual Machine network interface. Having a static IP address offers benefits such as:
* Allowing you to host a web server using the static IP
* Allowing other Virtual Machines access to your VM reliably using the static IP
When your Virtual Machine is created, `cloud-init` will generate a new file named `50-cloud-init.yaml` in the `/etc/netplan` directory and create a new network interface based on that file. To add a static IP address to the network interface, you need to create another file in the `/etc/netplan` other than `50-cloud-init.yaml`. When `cloud-init` creates the network interface, it will try to merge the content of these two configuration files. As a result, the static IP address will be added to the network interface. Below is an example content of the `50-cloud-init.yaml` file.
```yaml theme={null}
network:
version: 2
renderer: networkd
ethernets:
enp3s0:
dhcp4: true
match:
macaddress: fa:16:3e:1f:37:3c
mtu: 1500
set-name: enp3s0
```
To add a static IP to the `enp3s0` network interface, you can add the below content to the User Data field.
```yaml theme={null}
#cloud-config
...
write_files:
- content: |
network:
version: 2
renderer: networkd
ethernets:
enp3s0:
addresses:
- 192.170.1.25/24
- 2020:1::1/64
nameservers:
addresses:
- 8.8.8.8
- 8.8.4.4
path: /etc/netplan/00-add-static-ip.yaml
permissions: 0644
power_state:
mode: reboot
timeout: 30
condition: True
```
`Cloud-init` will execute two steps based on this configuration.
* First, `cloud-init` will create a new file named `00-add-static-ip.yaml` in `/etc/netplan` with instructions to add static IP addresses for both IPv4 (192.170.1.25) and IPv6 (2020:1::1.) The permission of the file is 0644, which means it is readable by any user and writable by `cloud-init`.
* When the Virtual Machine is rebooted (using the `power_state` block configuration), `cloud-init` will try to merge the network configuration for both `00-add-static-ip.yaml` and `50-cloud-init.yaml` files so that you can add static IP addresses to the `enp3s0` network interface.
Access the Virtual Machine once it is ready, and run the following command:
```sh theme={null}
ip a
```
You should see something similar to this:
```sh theme={null}
1: lo: mtu 65536 qdisc noqueue state UNKNOWN group default qlen 1000
link/loopback 00:00:00:00:00:00 brd 00:00:00:00:00:00
inet 127.0.0.1/8 scope host lo
valid_lft forever preferred_lft forever
inet6 ::1/128 scope host
valid_lft forever preferred_lft forever
2: enp3s0: mtu 1500 qdisc fq_codel state UP group default qlen 1000
link/ether fa:16:3e:6f:bc:a4 brd ff:ff:ff:ff:ff:ff
inet 192.170.1.25/24 brd 192.168.1.255 scope global enp3s0
valid_lft forever preferred_lft forever
inet 95.85.94.142/24 metric 100 brd 95.85.94.255 scope global dynamic enp3s0
valid_lft 86289sec preferred_lft 86289sec
inet6 2020:1::1/64 scope global
valid_lft forever preferred_lft forever
inet6 fe80::f816:3eff:fe6f:bca4/64 scope link
valid_lft forever preferred_lft forever
```
Notice in the enp3s0 interface, the static IP address for IPv4 is `192.170.1.25` and for IPv6 it is `2020:1::1`.
## Check Cloud-Init logs for errors
If you encounter any issues with `cloud-init`, you can check the logs to identify the problem. There are two main log files on your instances.
### Cloud-init log
The `cloud-init` log is located at `/var/log/cloud-init.log` and contains detailed information about the `cloud-init` process, including any errors that occur.
To view the `cloud-init` log, run the following command:
```sh theme={null}
cat /var/log/cloud-init.log
```
You should see the log output similar to this:
```sh theme={null}
2025-02-25 13:47:57,223 - util.py[DEBUG]: Cloud-init v. 24.4~3+really24.3.1-0ubuntu4 running 'init-local' at Tue, 25 Feb 2025 13:47:57 +0000. Up 10.68 seconds.
2025-02-25 13:47:57,227 - stages.py[DEBUG]: Using distro class
2025-02-25 13:47:57,228 - main.py[INFO]: PID [1] started cloud-init 'init-local'.
2025-02-25 13:47:57,228 - main.py[DEBUG]: No kernel command line url found.
2025-02-25 13:47:57,228 - main.py[DEBUG]: Closing stdin
2025-02-25 13:47:57,231 - util.py[DEBUG]: Writing to /var/log/cloud-init.log - ab: [640] 0 bytes
2025-02-25 13:47:57,232 - util.py[DEBUG]: Changing the ownership of /var/log/cloud-init.log to 102:4
2025-02-25 13:47:57,232 - util.py[DEBUG]: Writing to /var/lib/cloud/data/python-version - wb: [644] 4 bytes
2025-02-25 13:47:57,233 - util.py[DEBUG]: Attempting to remove /var/lib/cloud/instance/boot-finished
...
```
### Cloud-init output log
The `cloud-init-output` log is located at `/var/log/cloud-init-output.log` and contains the output of the scripts the `cloud-init` process runs.
To view the `cloud-init-output` log, run the following command:
```sh theme={null}
cat /var/log/cloud-init-output.log
```
You should see the log output similar to this:
```sh theme={null}
Cloud-init v. 24.4~3+really24.3.1-0ubuntu4 running 'init-local' at Tue, 25 Feb 2025 13:47:57 +0000. Up 10.68 seconds.
Cloud-init v. 24.4~3+really24.3.1-0ubuntu4 running 'init' at Tue, 25 Feb 2025 13:47:59 +0000. Up 13.00 seconds.
ci-info: +++++++++++++++++++++++++++++++++++++++Net device info+++++++++++++++++++++++++++++++++++++++
ci-info: +--------+------+------------------------------+---------------+--------+-------------------+
ci-info: | Device | Up | Address | Mask | Scope | Hw-Address |
ci-info: +--------+------+------------------------------+---------------+--------+-------------------+
ci-info: | enp3s0 | True | 11.222.111.222 | 255.255.255.0 | global | aa:bb:cc:dd:ee:ff |
ci-info: | enp3s0 | True | fe80::f816:3eff:fe25:e835/64 | . | link | aa:bb:cc:dd:ee:ff |
ci-info: | lo | True | 127.0.0.1 | 255.0.0.0 | host | . |
ci-info: | lo | True | ::1/128 | . | host | . |
...
```