> ## Documentation Index
> Fetch the complete documentation index at: https://gcore-doc-1046.mintlify.site/llms.txt
> Use this file to discover all available pages before exploring further.
# Create FastEdge HTTP applications
This guide describes how to create a FastEdge app. Check out our [FastEdge overview](/fastedge/getting-started) article to learn more about the product.
You can create a FastEdge app in two ways: by uploading a custom binary file (built using the [JavaScript SDK](https://github.com/G-Core/FastEdge-sdk-js) or [Rust](https://github.com/G-Core/FastEdge-sdk-rust)) or by using a preconfigured template. If you use a template, skip Stage 1.
## Stage 1. Create a Wasm binary file
To get started, create a .wasm file that you will later upload to the Gcore Customer Portal.
#### Step 1. Set up the environment
1\. Install the Rust compiler and cargo (package manager):
```sh theme={null}
curl --proto '=https' --tlsv1.2 -sSf https://sh.rustup.rs | sh
```
2\. Add the Wasm compilation target to Rust compiler:
```sh theme={null}
rustup target add wasm32-wasip1
```
#### Step 2. Prepare the directory structure and a configuration file
1\. Initialize the directory structure:
```sh theme={null}
cargo new myapp --lib
```
2\. Create a directory:
```sh theme={null}
mkdir myapp/.cargo
```
3\. Set the Wasm compilation target for the project by creating a config file `myapp/.cargo/config.toml` with the following content:
```toml theme={null}
[build]
target = "wasm32-wasip1"
```
4\. Create the project manifest file `myapp/Cargo.toml` with the following content:
```toml theme={null}
[package]
name = "myapp"
version = "0.1.0"
edition = "2021"
[lib]
crate-type = ["cdylib"]
[dependencies]
fastedge = "0.2"
```
#### Step 3. Create a source
In this example, we'll create a simple app that responds with "HTTP 200" and the text "Hello world!" in the response's body. You can find more examples in the [Gcore repository](https://github.com/G-Core/FastEdge-examples/tree/main/rust).
Create a main source file src/lib.rs with the following content:
```
use fastedge::{
body::Body,
http::{Request, Response, StatusCode, Error},
};
#[fastedge::http]
fn main(_req: Request) -> Result, Error> {
Response::builder()
.status(StatusCode::OK)
.body(Body::from("Hello world!\n"))
}
```
#### Step 4. Compile a Wasm file
Produce the Wasm binary:
```sh theme={null}
cargo build --release
```
The resulting Wasm code will be written to the `myapp/target/wasm32-wasip1/release/myapp.wasm` file.
A JavaScript code pattern closely resembles [Service Worker API](https://developer.mozilla.org/en-US/docs/Web/API/Service_Worker_API). You can also find multiple examples in the [Gcore repository](https://github.com/G-Core/FastEdge-examples/tree/main/javascript).
The key aspect of the Wasm configuration is to set up the `addEventListener` that has to synchronously call `event.respondWith` with a callback. This callback can be asynchronous and this is where you'd usually include any custom code to generate a response.
Here's the sample app source:
```js theme={null}
async function app(event) {
const request = event.request;
return new Response(`You made a request to ${request.url}`);
}
addEventListener('fetch', (event) => {
event.respondWith(app(event));
});
```
Run the command `npm create fastedge-app my-first-app`.
For first-time setup select the following options:
```
$ npm create fastedge-app my-first-app
┌ create-fastedge-app
│
◇ Creating in provided directory: ./my-first-app
│
◇ Select programming language:
│ TypeScript
│
◇ Language: typescript
│
◇ Select a template:
│ http-base
│
◆ Do you want to continue?
│ ● Yes / ○ No
```
## Stage 2. Deploy an application
For detailed steps on how to deploy a FastEdge app, refer to the relevant sections below:
* [In the Customer Portal](/fastedge/getting-started/create-fastedge-apps#in-the-customer-portal). Follow the instructions if you created a custom Wasm using either the Rust or Javascript SDK, or if you want to create a FastEdge app from a preconfigured template.
* [Via command line](/fastedge/getting-started/create-fastedge-apps#via-command-line): Follow the instructions if you want to deploy a custom Wasm using cURL and our API.
### In the customer portal
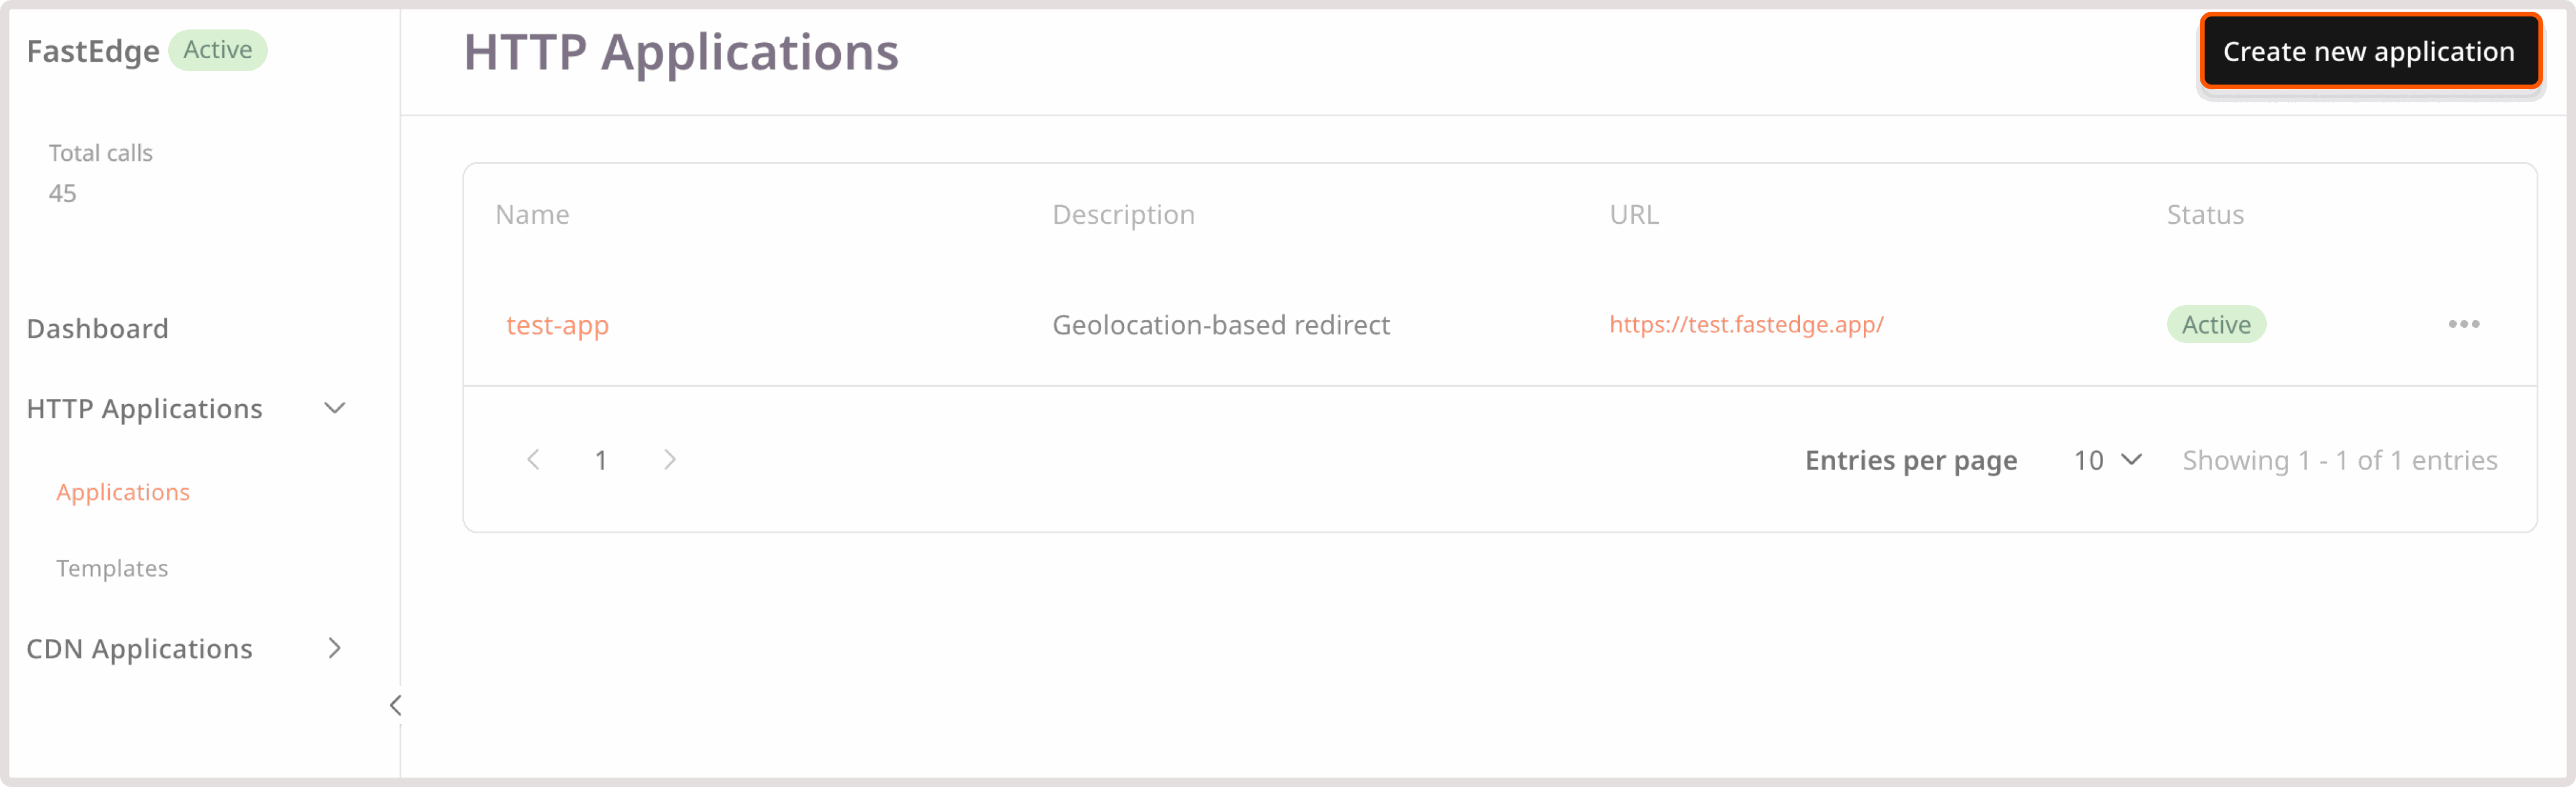
1\. In the [Gcore Customer Portal](https://portal.gcore.com/accounts/reports/dashboard), navigate to **FastEdge** > **HTTP Applications**.
2\. In the top-right corner of the screen, click **Create new application**.
 3\. Click **Upload binary**.
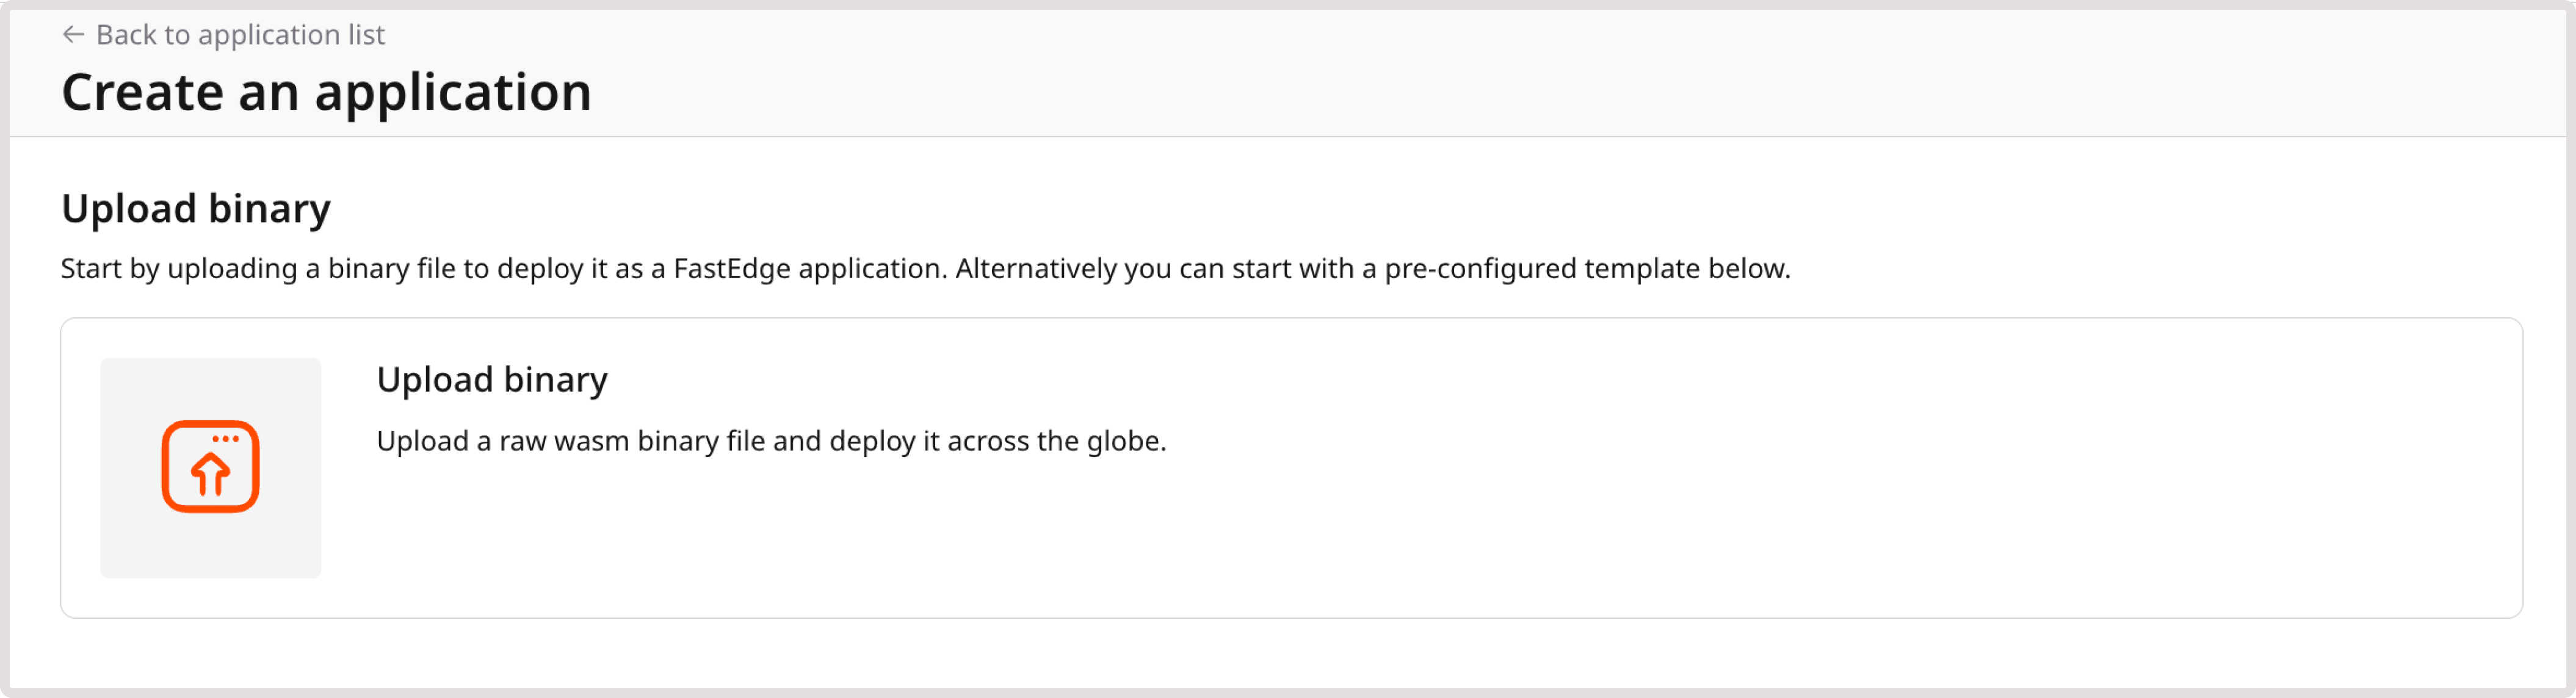 4\. Choose your custom binary file.
 5\. Enter a name for your application and provide a description if needed.
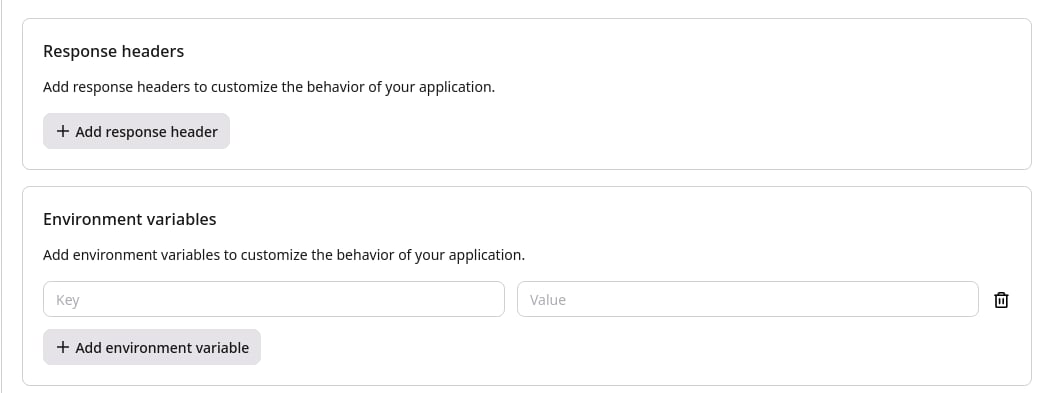
6\. (Optional) Click **+ Add response headers** to add fixed headers to the responses. For example, you may include CORS (cross-origin resource sharing) headers in each response to ensure secure communication between origins.
7\. (Optional) If you want to customize the behavior of your application, click **+ Add environment variables** and enter your data as key-value pairs.
5\. Enter a name for your application and provide a description if needed.
6\. (Optional) Click **+ Add response headers** to add fixed headers to the responses. For example, you may include CORS (cross-origin resource sharing) headers in each response to ensure secure communication between origins.
7\. (Optional) If you want to customize the behavior of your application, click **+ Add environment variables** and enter your data as key-value pairs.
 **Info**
If you're adding sensitive information or want to ensure that any data in the app's configuration remains secure, click **+ Add Secret** and use the Secrets Manager.
8\. Check all the settings. If everything is configured correctly, click **Save and deploy**.
Your application has been successfully deployed.
**Info**
If you're adding sensitive information or want to ensure that any data in the app's configuration remains secure, click **+ Add Secret** and use the Secrets Manager.
8\. Check all the settings. If everything is configured correctly, click **Save and deploy**.
Your application has been successfully deployed.
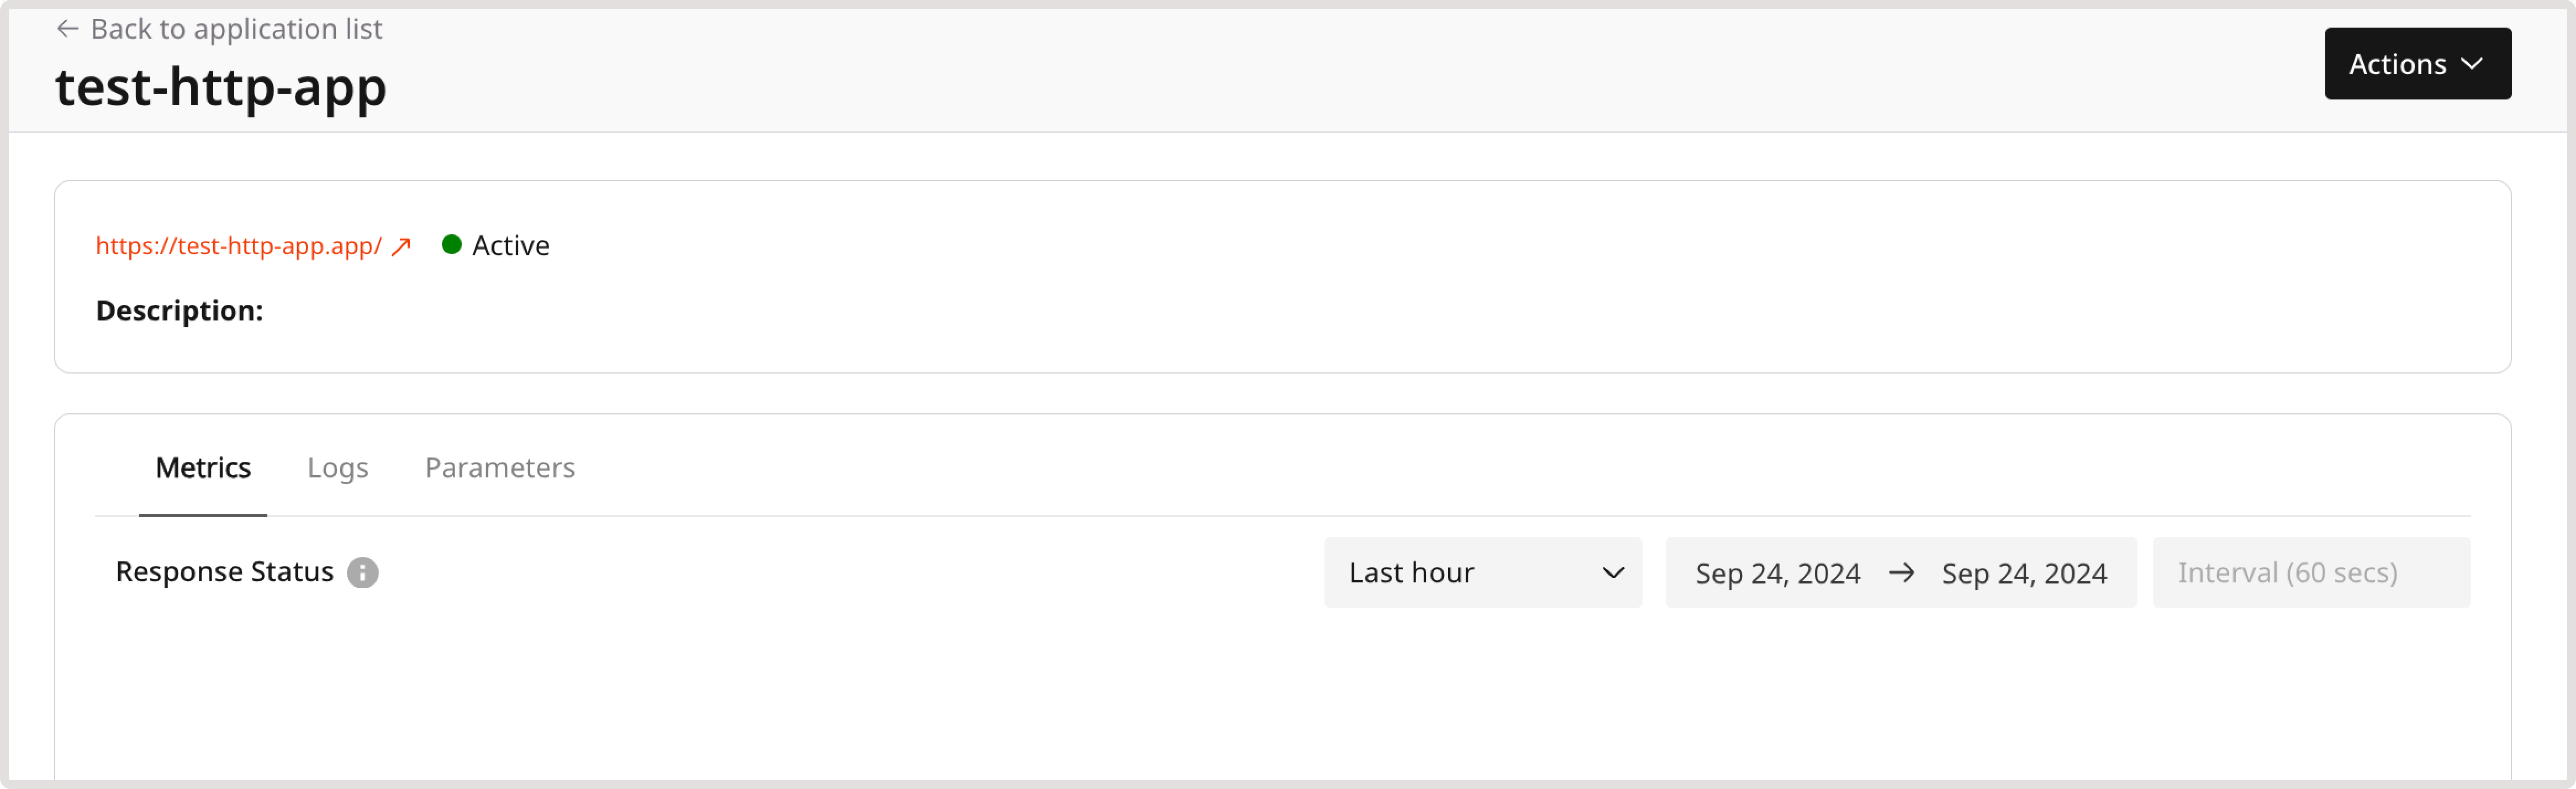 You can now test its configuration and adjust it as described in the following steps.
1\. In the [Gcore Customer Portal](https://portal.gcore.com/accounts/reports/dashboard), navigate to **FastEdge** > **HTTP Applications**.
2\. In the top-right corner of the screen, click **Create new application**.
3\. In the **Create from a template** section, select the preferred template.
You can now test its configuration and adjust it as described in the following steps.
1\. In the [Gcore Customer Portal](https://portal.gcore.com/accounts/reports/dashboard), navigate to **FastEdge** > **HTTP Applications**.
2\. In the top-right corner of the screen, click **Create new application**.
3\. In the **Create from a template** section, select the preferred template.
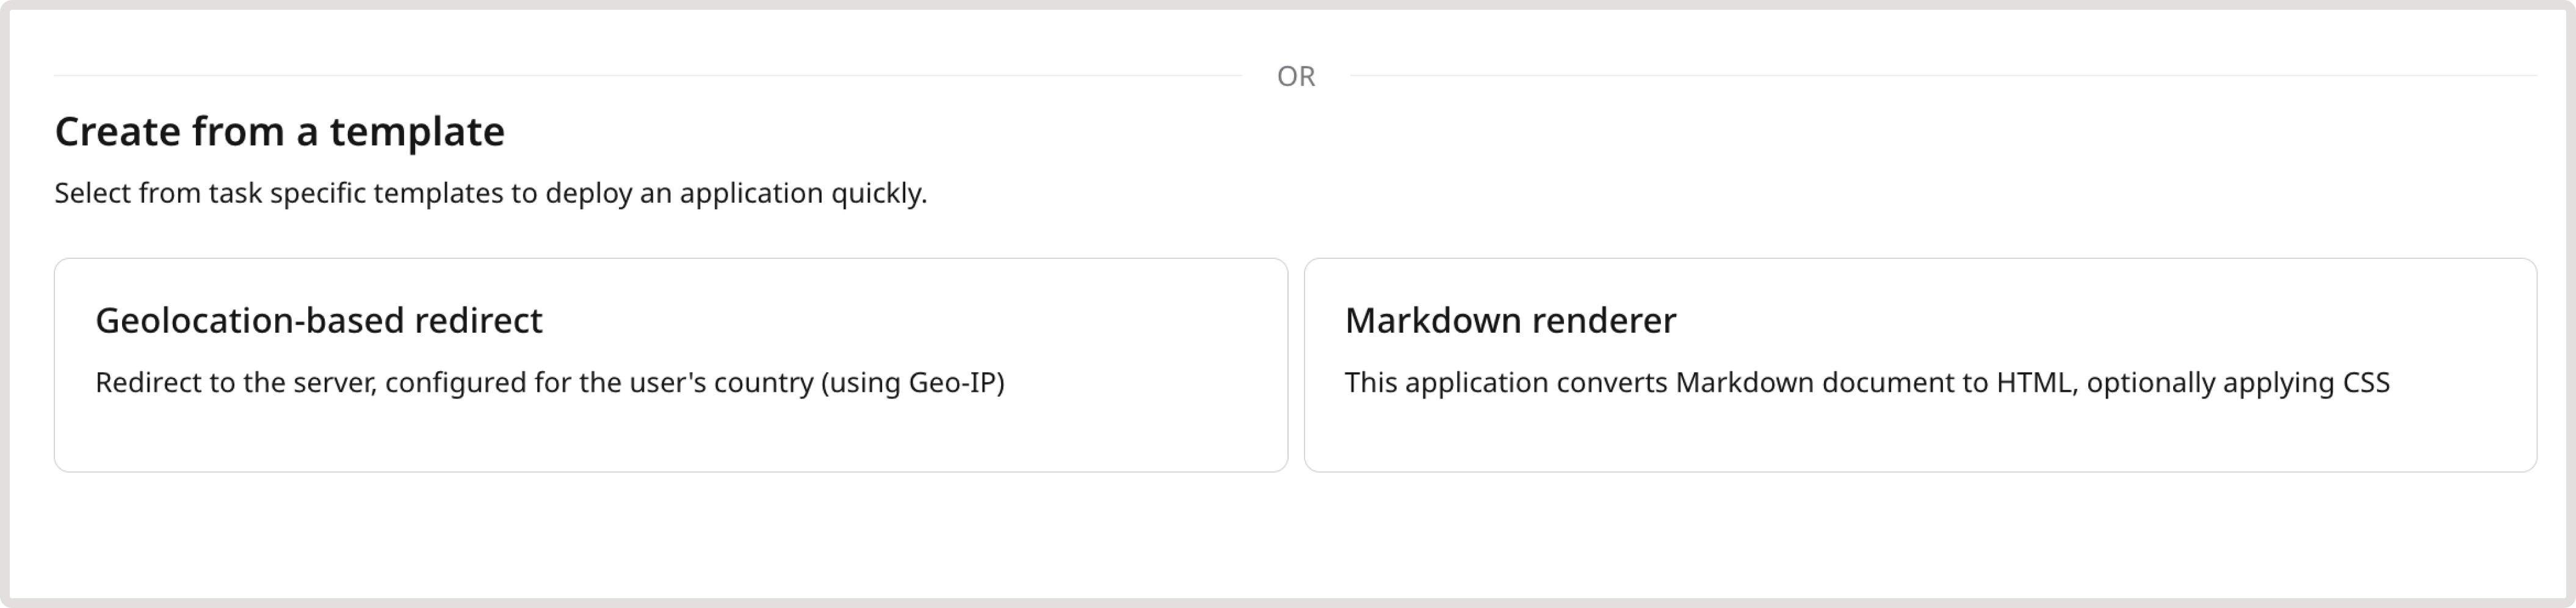 4\. Enter a name for your application and, optionally, update its description.
5\. Provide environment variables or any required configuration for your app. Note that the list of setup options depends on the selected template. For example, if you create a FastEdge app from a Markdown template, you need to add response headers, enter the base part of the origin URL, and add content from the `` section of an HTML document.
6\. (Optional) If you want to add metadata to the configuration, click **+ Add environment variables** and enter metadata as key-value pairs.
4\. Enter a name for your application and, optionally, update its description.
5\. Provide environment variables or any required configuration for your app. Note that the list of setup options depends on the selected template. For example, if you create a FastEdge app from a Markdown template, you need to add response headers, enter the base part of the origin URL, and add content from the `` section of an HTML document.
6\. (Optional) If you want to add metadata to the configuration, click **+ Add environment variables** and enter metadata as key-value pairs.
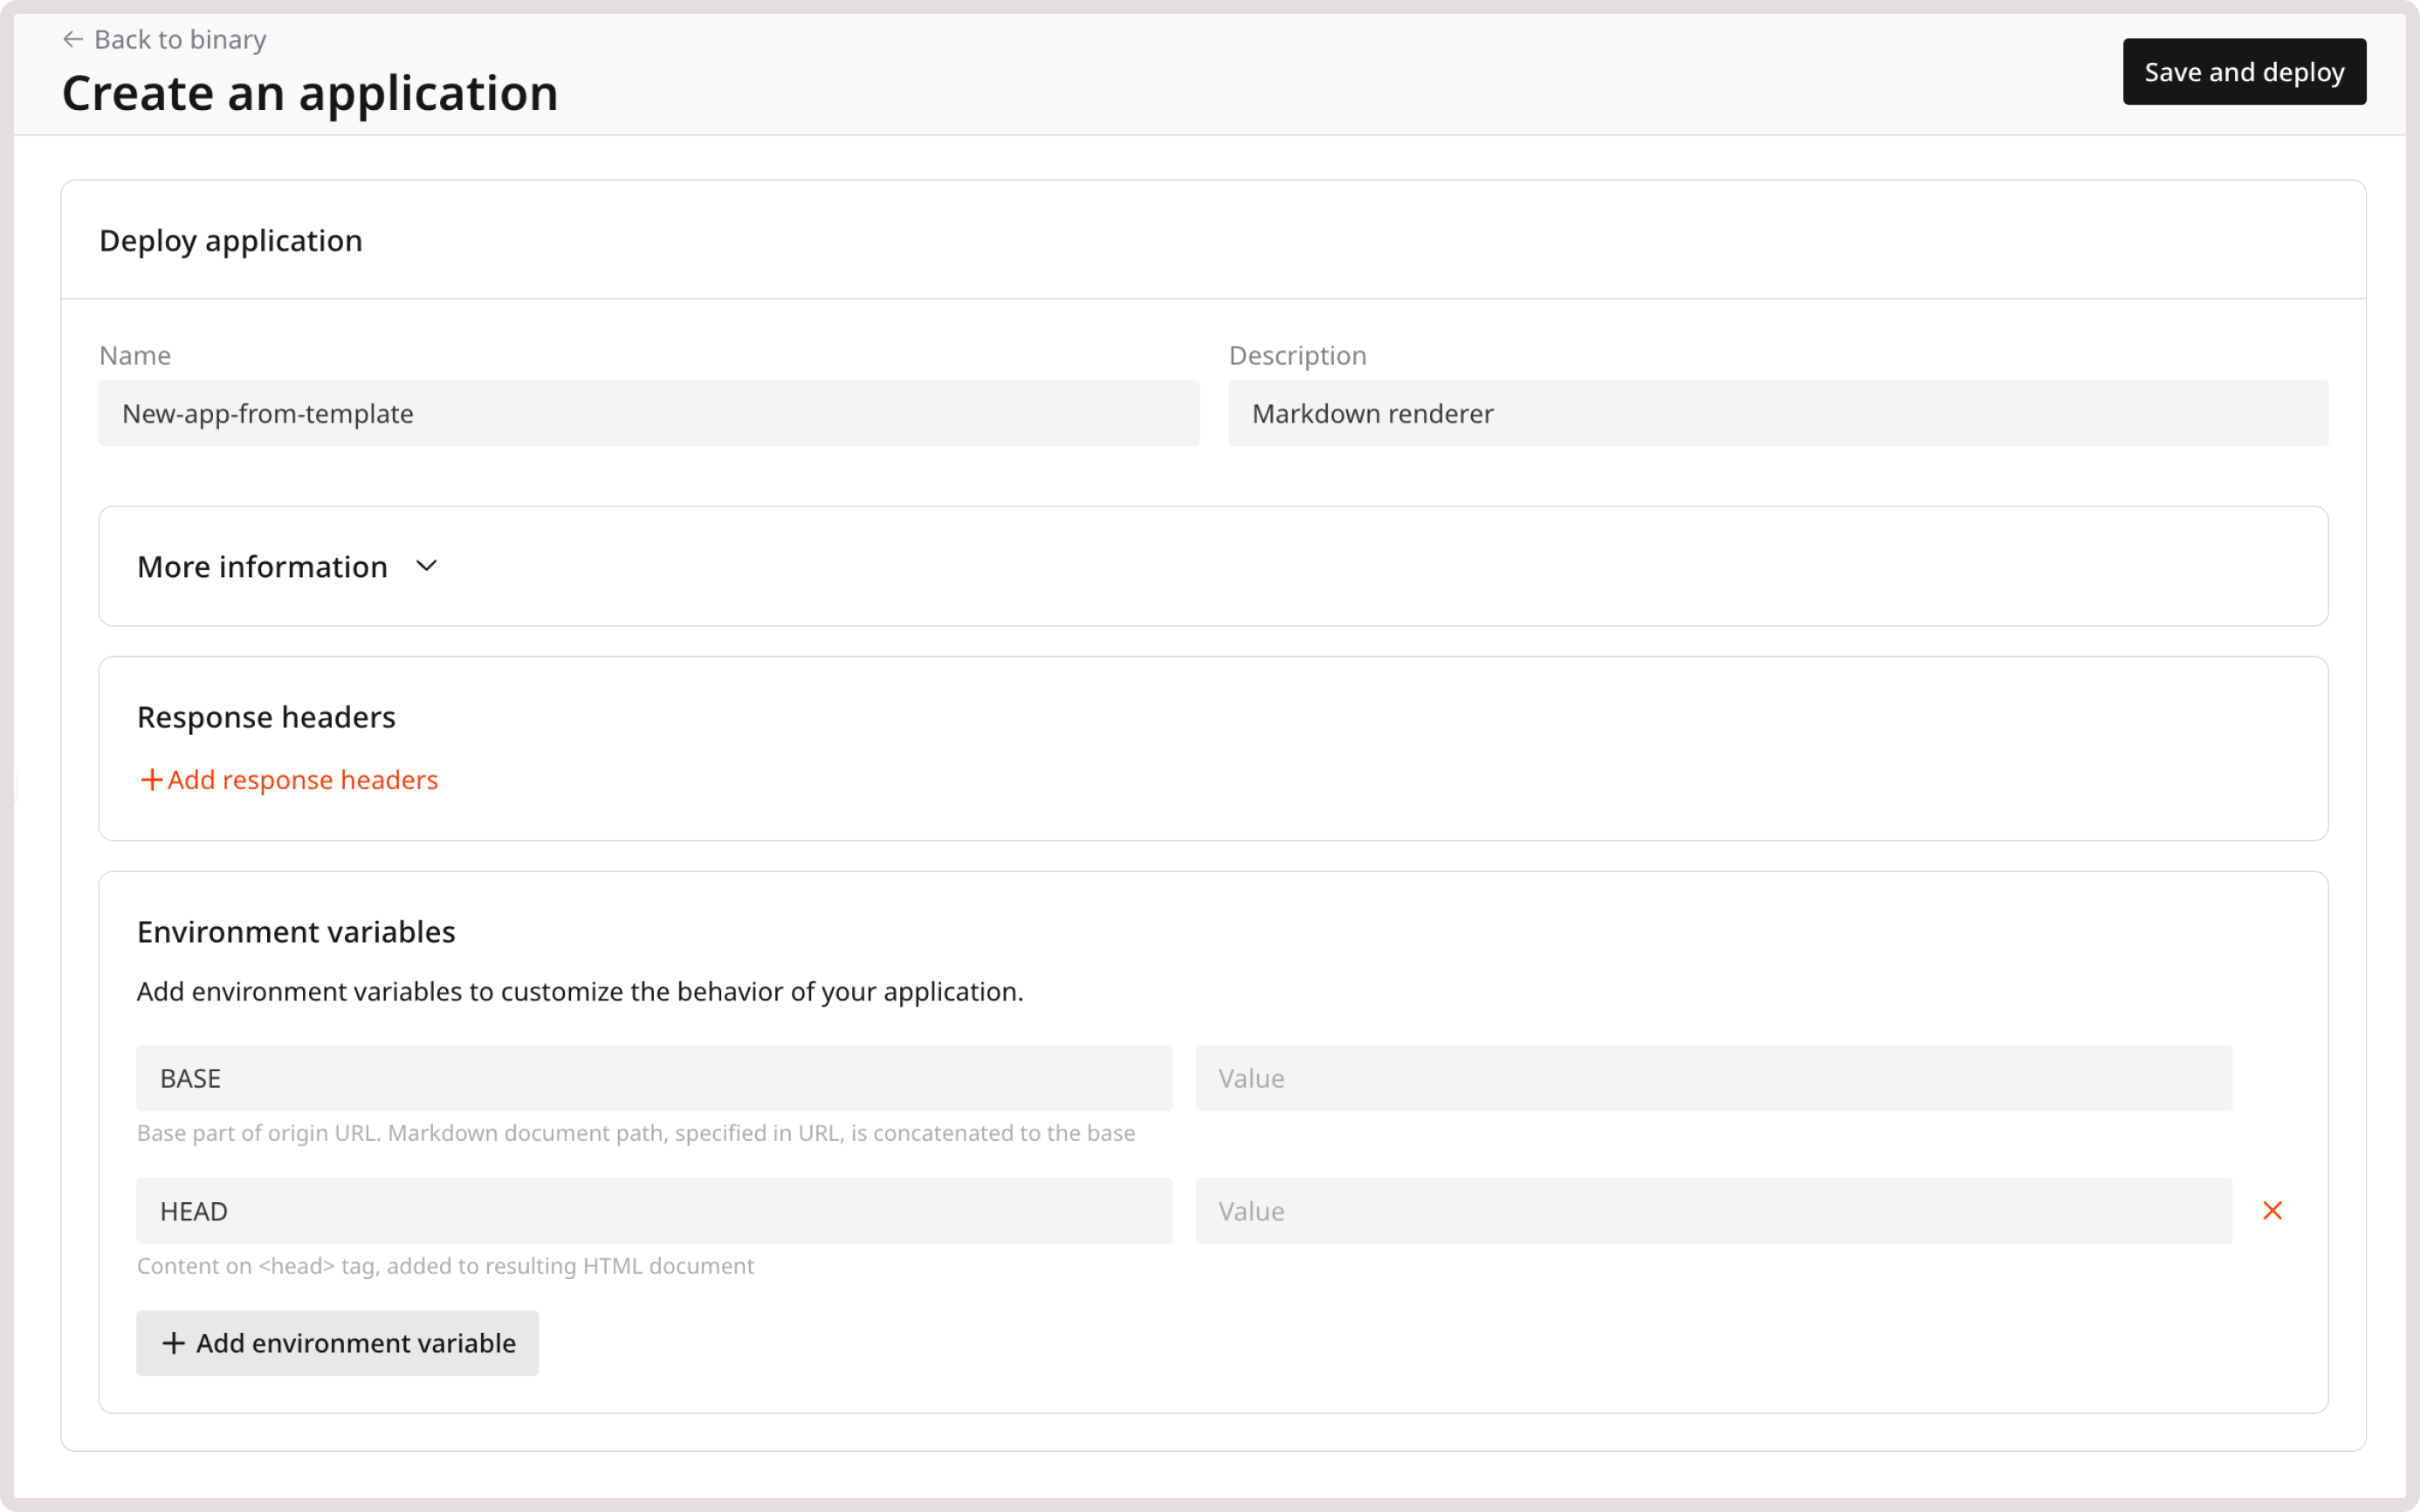 7\. Click **Save and deploy**.
Your application has been successfully deployed.
7\. Click **Save and deploy**.
Your application has been successfully deployed.
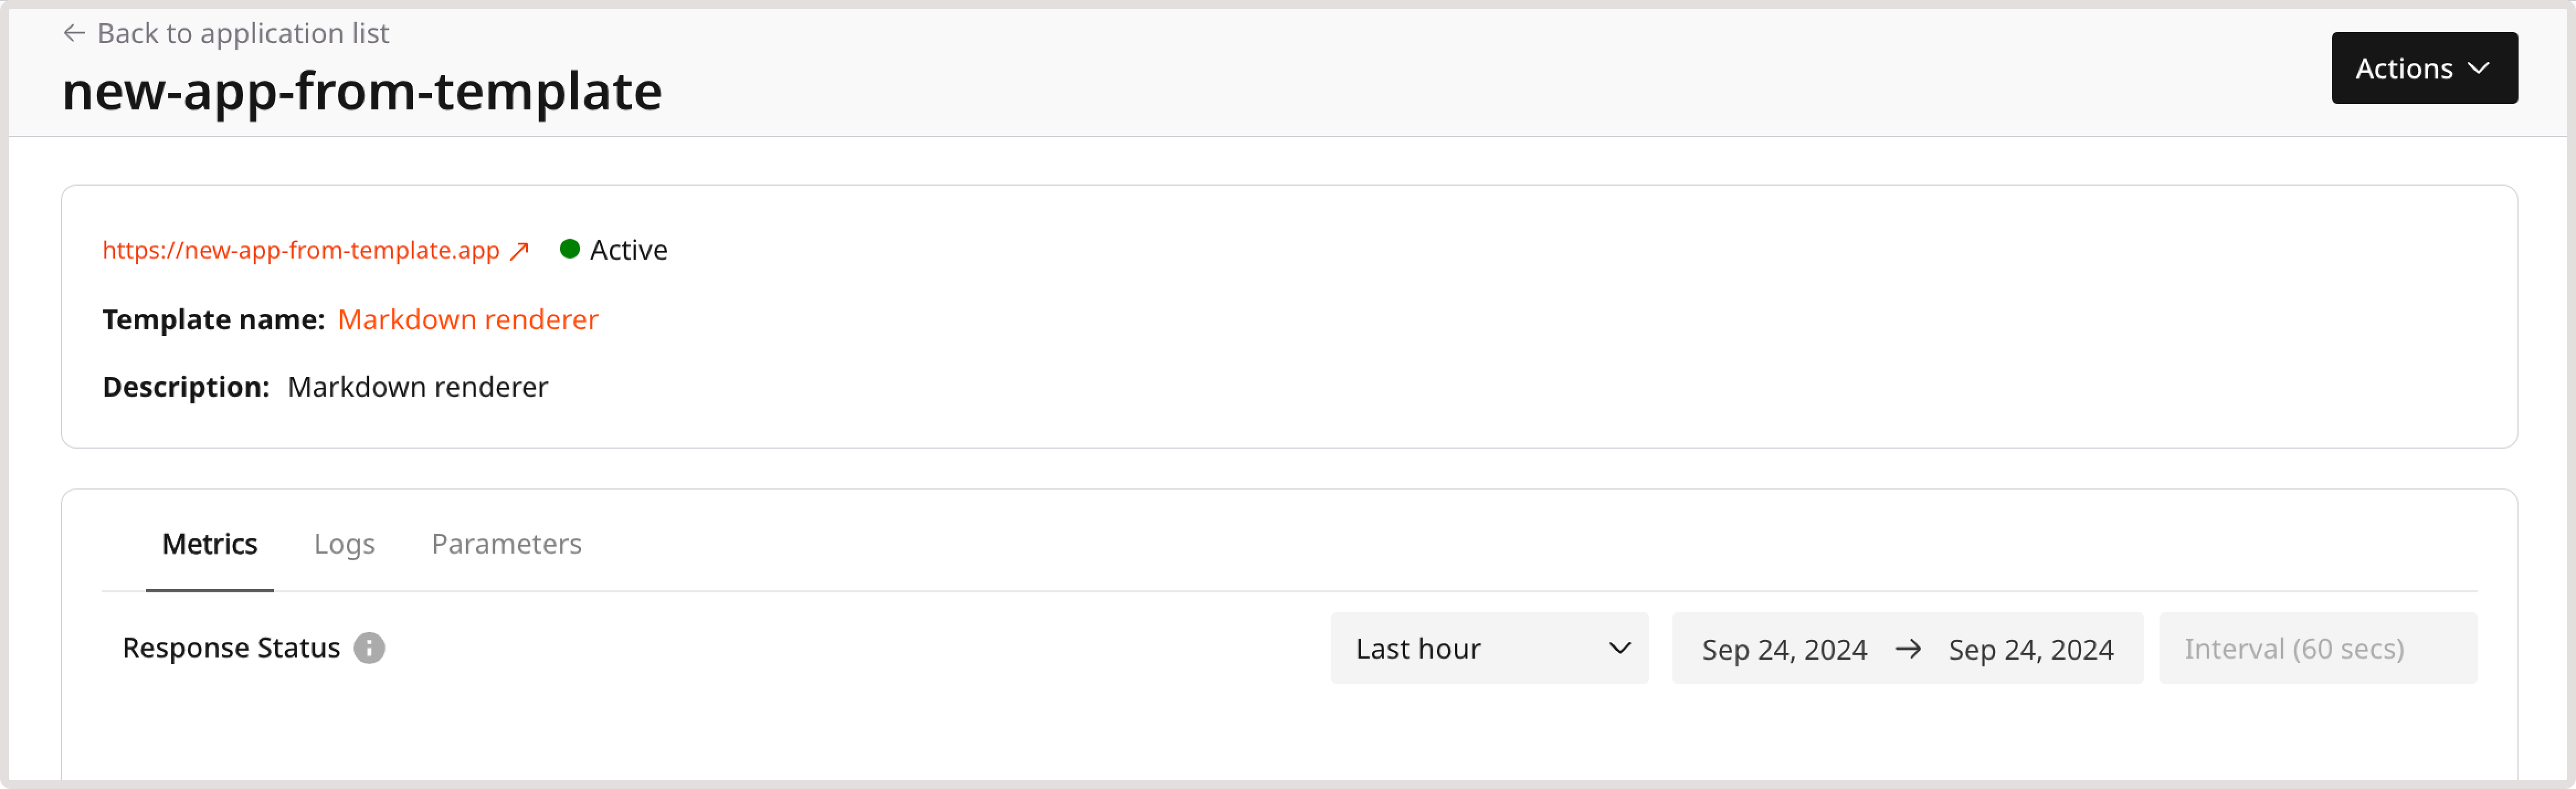 You can now test its configuration and adjust it as described in the following steps.
### Via command line
1\. Upload the Wasm binary to our edge servers by running the following [API request](https://gcore.com/docs/api-reference/fastedge/binaries/store-compiled-wasm-binary) from the repo's root directory. Insert your [permanent API token](/account-settings/api-tokens) instead of the api\_key:
```sh theme={null}
curl -X 'POST'
'https://api.gcore.com/fastedge/v1/binaries/raw' \
-H 'accept: application/json'
-H 'Authorization: APIKey api_key'
-H 'Content-Type: application/octet-stream'
--data-binary '@./dist/main.wasm'
```
In the response, you will receive the ID of the uploaded binary (``). Make sure to save it, as it will be used in the following step.
2\. Create the app by running the following [API request](https://gcore.com/docs/api-reference/fastedge/apps/add-a-new-app):
```sh theme={null}
curl -X 'POST'
'https://api.gcore.com/fastedge/v1/apps'
-H 'name: app_name'
-H 'accept: application/json'
-H 'client_id: 0'
-H 'Authorization: APIKey api_key'
-H 'Content-Type: application/json'
-d '{
"binary": binary_id,
"plan": "beta",
"status": 1
}'
```
Where:
* `app_name` is the unique name of your app.
* `api_key` is your permanent API token.
* `binary_id` is the ID of your uploaded Wasm binary.
## Stage 3. Test an application
You can test the application after its deployment by clicking the application link on the deployment confirmation screen:
You can now test its configuration and adjust it as described in the following steps.
### Via command line
1\. Upload the Wasm binary to our edge servers by running the following [API request](https://gcore.com/docs/api-reference/fastedge/binaries/store-compiled-wasm-binary) from the repo's root directory. Insert your [permanent API token](/account-settings/api-tokens) instead of the api\_key:
```sh theme={null}
curl -X 'POST'
'https://api.gcore.com/fastedge/v1/binaries/raw' \
-H 'accept: application/json'
-H 'Authorization: APIKey api_key'
-H 'Content-Type: application/octet-stream'
--data-binary '@./dist/main.wasm'
```
In the response, you will receive the ID of the uploaded binary (``). Make sure to save it, as it will be used in the following step.
2\. Create the app by running the following [API request](https://gcore.com/docs/api-reference/fastedge/apps/add-a-new-app):
```sh theme={null}
curl -X 'POST'
'https://api.gcore.com/fastedge/v1/apps'
-H 'name: app_name'
-H 'accept: application/json'
-H 'client_id: 0'
-H 'Authorization: APIKey api_key'
-H 'Content-Type: application/json'
-d '{
"binary": binary_id,
"plan": "beta",
"status": 1
}'
```
Where:
* `app_name` is the unique name of your app.
* `api_key` is your permanent API token.
* `binary_id` is the ID of your uploaded Wasm binary.
## Stage 3. Test an application
You can test the application after its deployment by clicking the application link on the deployment confirmation screen:
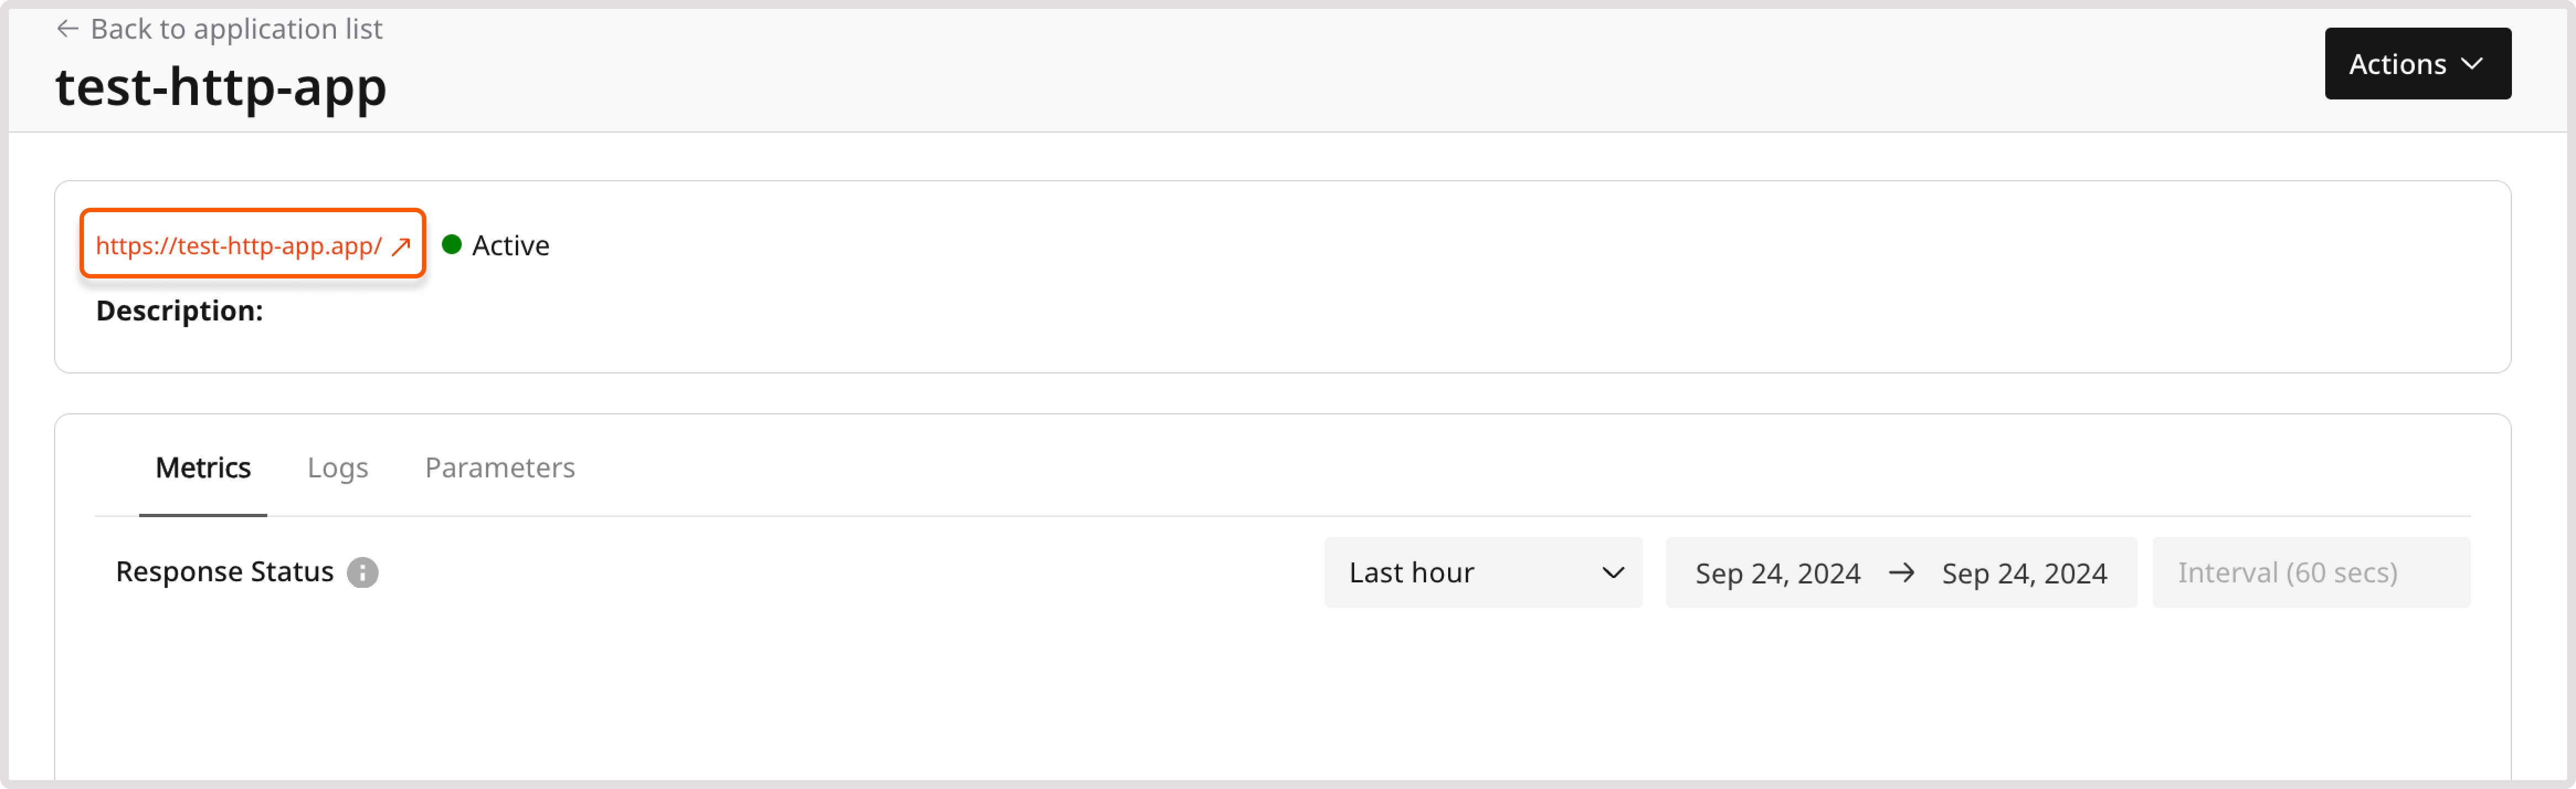 Additionally, you can inspect and adjust the configuration in the Customer Portal on the **HTTP Applications** page:
1\. In the Gcore Customer Portal, navigate to **FastEdge** > **HTTP Applications** > **Applications**.
Additionally, you can inspect and adjust the configuration in the Customer Portal on the **HTTP Applications** page:
1\. In the Gcore Customer Portal, navigate to **FastEdge** > **HTTP Applications** > **Applications**.
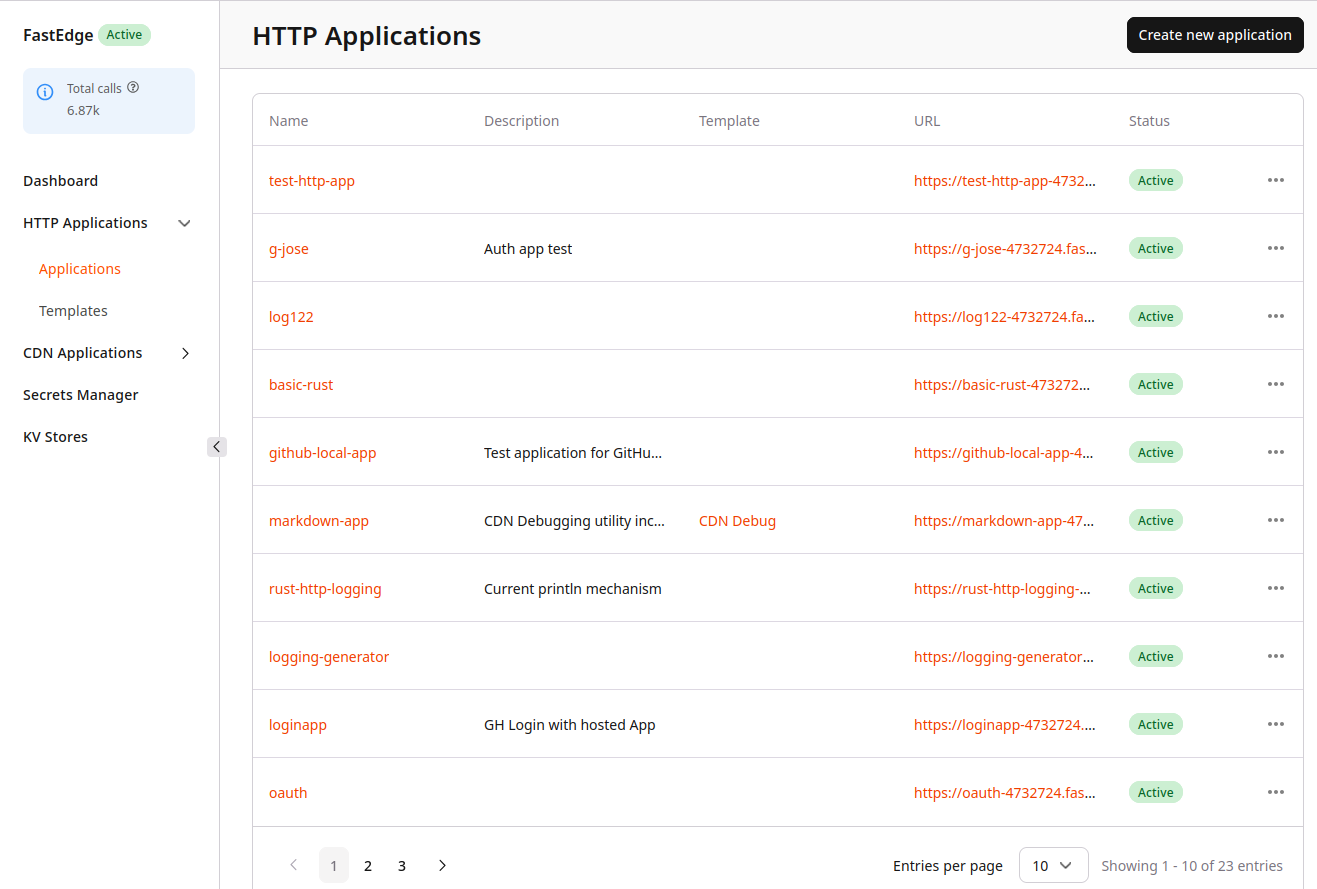 2\. Find the app you want to test and click its name to open it.
3\. Click the app link next to the app status to view the response.
For example, the response for the application configured in Stage 1 will be "Hello world!".
## Stage 4 (Optional). Add more functionality
You can add more functionality to your app. For example, instead of printing "Hello world!", the app can print all request headers and set a custom response header from the environment settings. Let's see how to do that.
#### Step 1. Change the source
To print all request headers and develop a custom response header, replace the current content of the `myapp/src/lib.rs` file with the following:
```
use fastedge::{
body::Body,
http::{Request, Response, StatusCode, Error},
};
use std::env;
#[fastedge::http]
fn main(req: Request) -> Result, Error> {
// print headers
let mut body: String = "".to_string();
for (h, v) in req.headers() {
body.push_str(h.as_str());
body.push_str(": ");
match v.to_str() {
Err(_) => body.push_str("not a valid text"),
Ok(a) => body.push_str(a),
}
body.push_str("\n");
}
// get value for custom header from the env var
let value = match env::var("CUSTOM_HEADER").ok() {
None => return Response::builder()
.status(StatusCode::INTERNAL_SERVER_ERROR)
.body(Body::from("App misconfigured\n")),
Some(val) => val
};
// build response with body and custom header
Response::builder()
.status(StatusCode::OK)
.header("Custom-Header", value)
.body(Body::from(body))
}
```
**Info**
The headers listed in the following step are passed to the FastEdge application, which uses the header content for functionalities like geolocation-aware redirects.
#### Step 2. Compile and upload the binary file
Update the application on the edge servers:
1\. Compile a new Wasm file [as described in stage 1](/fastedge/getting-started/create-fastedge-apps#step-4-compile-a-wasm-file).
2\. Upload it to the Gcore Customer Portal as a custom binary file.
When you open the app, you'll see all request headers from the environment settings. It will be similar to the following output:
```sh theme={null}
HTTP/2 200
server: nginx
date: Thu, 19 Oct 2023 22:17:46 GMT
content-length: 616
custom-header: foo
access-control-allow-origin: *
cache-control: no-store
x-id: ed-hw-edge-preprod-gc39
cache: MISS
accept-ranges: bytes
dc: ed
geoip-asn: 7922
geoip-lat: 37.75580
geoip-long: -121.95270
geoip-reg: CA
geoip-city: San Ramon
geoip-continent: NA
geoip-country-name: United States
geoip-country-code: US
server_addr: 92.223.112.26
server_name: mistake-globe-6396.fastedge.gcore.dev
connection: upgrade
x-real-ip: 1.2.3.4
x-forwarded-for: 1.2.3.4
host: fastedge.gcore.dev
x-forwarded-proto: https
user-agent: curl/7.88.1
accept: */*
cdn-loop: nb1d2; c=11
pop-long: 6.1294
pop-lat: 49.6113
pop-reg: LU
pop-continent: EU
pop-city: Luxembourg
pop-country-code: LU
pop-country-name: Luxembourg
```
* custom-header: Custom header
* dc: Data center
* geoip-\*: Client GeoIP data, such as asn, latitude, longitude, region, city, continent, country name, and country code
* server\_addr: PoP IP address
* server\_name: Application hostname
* x-forwarded-for: Client IP address
* pop-\*: PoP GeoIP data, such as asn, latitude, longitude, region, city, continent, country name, and country code
You can add more functionality to your app. For example, instead of printing "You made a request to /", the app can print all request headers and set a custom response header from the environment settings.
#### Step 1. Print request headers and add custom response header
Replace the sample configuration in the `src/input.js` with the following code:
```js theme={null}
import { getEnv } from 'fastedge::env';
async function eventHandler(event) {
const request = event.request;
const customEnvVariable = getEnv('MY_CUSTOM_ENV_VAR');
const headersStr = JSON.stringify(Object.fromEntries(request.headers.entries()), null, 2);
return new Response(`Headers: ${headersStr}\n`, {
headers: {
'Custom-Header': customEnvVariable,
},
});
}
addEventListener('fetch', (event) => {
event.respondWith(eventHandler(event));
});
```
The application logic (e.g., location-aware redirection) assumes the use of the headers listed in the following steps. The headers may change in the future.
#### Step 2. Compile a new Wasm binary
Run the command you used in the Stage 1: `npx fastegde-build ./src/input.js ./dist/main.wasm`
#### Step 3. Compile a new Wasm binary
Upload the new Wasm file to the edge servers with the same API request you executed in Stage 2:
```sh theme={null}
curl -X 'POST'
'https://api.gcore.com/fastedge/v1/binaries/raw'
-H 'accept: application/json'
-H 'Authorization: APIKey api_key'
-H 'Content-Type: application/octet-stream'
--data-binary '@./dist/main.wasm'
```
Don't forget to save the ID of the new Wasm binary, as you'll need to use it in the following step.
#### Step 4. Update the app
Run the following API request:
```sh theme={null}
curl -X 'PUT'
'https://api.gcore.com/fastedge/v1/apps/app_id'
-H 'accept: application/json'
-H 'Authorization: APIKey api_key'
-H 'Content-Type: application/json'
-d '{
"binary": new_binary_id,
"plan": "beta",
"status": 1,
"name": app_name,
"env": {
"MY_CUSTOM_ENV_VAR": "Custom-Header-Value"
}
}'
```
Where:
* app\_name is the unique name of your app.
* app\_id is the app ID.
* api\_key is your [permanent API token](/account-settings/api-tokens).
* binary\_id is the ID of your uploaded Wasm binary.
#### Step 5. Test the app
Run the following curl request: `curl https://.fastedge.gcore.dev/`, where `` is the name of your application indicated in the previous step.
If everything is updated correctly, the response will be:
```json theme={null}
{
"Headers": {
"dc": "ed",
"my-custom-header": "Custom-Header-Value",
"geoip-asn": "199524",
"geoip-lat": "49.61130",
"geoip-long": "6.12940",
"geoip-reg": "LU",
"geoip-city": "Luxembourg",
"geoip-continent": "EU",
"geoip-country-name": "Luxembourg",
"geoip-country-code": "LU",
"server_addr": "192.2.3.4",
"server_addrserver_name": "bear-wiggle-4732724.fastedge.gcore.dev",
"connection": "upgrade",
"x-real-ip": "1.2.3.4",
"x-cdn-requestor": "ed-hw-edge-preprod-gc39",
"server_addrx-forwarded-for": "1.2.3.4",
"host": "fastedge.gcore.dev",
"x-forwarded-proto": "https",
"user-agent": "curl/7.81.0",
"cdn-loop": "nb1d2; c=11",
"server_addrpop-country-code": "LU",
"server_addrpop-reg": "LU",
"server_addrpop-country-name": "Luxembourg",
"server_addrpop-lat": "49.6113",
"server_addrpop-long": "6.1294",
"server_addrpop-continent": "EU",
"server_addrpop-city": "Luxembourg"
}
}
```
* my-custom-header: Added custom header
* dc: Data center
* geoip-\*: Client GeoIP data, such as asn, latitude, longitude, region, city, continent, country name, and country code
* server\_addr: PoP IP address
* server\_name: Application hostname
* x-forwarded-for: Client IP address
* pop-\*: PoP GeoIP data, such as asn, latitude, longitude, region, city, continent, country name, and country code
## Troubleshoot an application
If you're having issues with your FastEdge application, see [Troubleshooting](/fastedge/troubleshooting).
2\. Find the app you want to test and click its name to open it.
3\. Click the app link next to the app status to view the response.
For example, the response for the application configured in Stage 1 will be "Hello world!".
## Stage 4 (Optional). Add more functionality
You can add more functionality to your app. For example, instead of printing "Hello world!", the app can print all request headers and set a custom response header from the environment settings. Let's see how to do that.
#### Step 1. Change the source
To print all request headers and develop a custom response header, replace the current content of the `myapp/src/lib.rs` file with the following:
```
use fastedge::{
body::Body,
http::{Request, Response, StatusCode, Error},
};
use std::env;
#[fastedge::http]
fn main(req: Request) -> Result, Error> {
// print headers
let mut body: String = "".to_string();
for (h, v) in req.headers() {
body.push_str(h.as_str());
body.push_str(": ");
match v.to_str() {
Err(_) => body.push_str("not a valid text"),
Ok(a) => body.push_str(a),
}
body.push_str("\n");
}
// get value for custom header from the env var
let value = match env::var("CUSTOM_HEADER").ok() {
None => return Response::builder()
.status(StatusCode::INTERNAL_SERVER_ERROR)
.body(Body::from("App misconfigured\n")),
Some(val) => val
};
// build response with body and custom header
Response::builder()
.status(StatusCode::OK)
.header("Custom-Header", value)
.body(Body::from(body))
}
```
**Info**
The headers listed in the following step are passed to the FastEdge application, which uses the header content for functionalities like geolocation-aware redirects.
#### Step 2. Compile and upload the binary file
Update the application on the edge servers:
1\. Compile a new Wasm file [as described in stage 1](/fastedge/getting-started/create-fastedge-apps#step-4-compile-a-wasm-file).
2\. Upload it to the Gcore Customer Portal as a custom binary file.
When you open the app, you'll see all request headers from the environment settings. It will be similar to the following output:
```sh theme={null}
HTTP/2 200
server: nginx
date: Thu, 19 Oct 2023 22:17:46 GMT
content-length: 616
custom-header: foo
access-control-allow-origin: *
cache-control: no-store
x-id: ed-hw-edge-preprod-gc39
cache: MISS
accept-ranges: bytes
dc: ed
geoip-asn: 7922
geoip-lat: 37.75580
geoip-long: -121.95270
geoip-reg: CA
geoip-city: San Ramon
geoip-continent: NA
geoip-country-name: United States
geoip-country-code: US
server_addr: 92.223.112.26
server_name: mistake-globe-6396.fastedge.gcore.dev
connection: upgrade
x-real-ip: 1.2.3.4
x-forwarded-for: 1.2.3.4
host: fastedge.gcore.dev
x-forwarded-proto: https
user-agent: curl/7.88.1
accept: */*
cdn-loop: nb1d2; c=11
pop-long: 6.1294
pop-lat: 49.6113
pop-reg: LU
pop-continent: EU
pop-city: Luxembourg
pop-country-code: LU
pop-country-name: Luxembourg
```
* custom-header: Custom header
* dc: Data center
* geoip-\*: Client GeoIP data, such as asn, latitude, longitude, region, city, continent, country name, and country code
* server\_addr: PoP IP address
* server\_name: Application hostname
* x-forwarded-for: Client IP address
* pop-\*: PoP GeoIP data, such as asn, latitude, longitude, region, city, continent, country name, and country code
You can add more functionality to your app. For example, instead of printing "You made a request to /", the app can print all request headers and set a custom response header from the environment settings.
#### Step 1. Print request headers and add custom response header
Replace the sample configuration in the `src/input.js` with the following code:
```js theme={null}
import { getEnv } from 'fastedge::env';
async function eventHandler(event) {
const request = event.request;
const customEnvVariable = getEnv('MY_CUSTOM_ENV_VAR');
const headersStr = JSON.stringify(Object.fromEntries(request.headers.entries()), null, 2);
return new Response(`Headers: ${headersStr}\n`, {
headers: {
'Custom-Header': customEnvVariable,
},
});
}
addEventListener('fetch', (event) => {
event.respondWith(eventHandler(event));
});
```
The application logic (e.g., location-aware redirection) assumes the use of the headers listed in the following steps. The headers may change in the future.
#### Step 2. Compile a new Wasm binary
Run the command you used in the Stage 1: `npx fastegde-build ./src/input.js ./dist/main.wasm`
#### Step 3. Compile a new Wasm binary
Upload the new Wasm file to the edge servers with the same API request you executed in Stage 2:
```sh theme={null}
curl -X 'POST'
'https://api.gcore.com/fastedge/v1/binaries/raw'
-H 'accept: application/json'
-H 'Authorization: APIKey api_key'
-H 'Content-Type: application/octet-stream'
--data-binary '@./dist/main.wasm'
```
Don't forget to save the ID of the new Wasm binary, as you'll need to use it in the following step.
#### Step 4. Update the app
Run the following API request:
```sh theme={null}
curl -X 'PUT'
'https://api.gcore.com/fastedge/v1/apps/app_id'
-H 'accept: application/json'
-H 'Authorization: APIKey api_key'
-H 'Content-Type: application/json'
-d '{
"binary": new_binary_id,
"plan": "beta",
"status": 1,
"name": app_name,
"env": {
"MY_CUSTOM_ENV_VAR": "Custom-Header-Value"
}
}'
```
Where:
* app\_name is the unique name of your app.
* app\_id is the app ID.
* api\_key is your [permanent API token](/account-settings/api-tokens).
* binary\_id is the ID of your uploaded Wasm binary.
#### Step 5. Test the app
Run the following curl request: `curl https://.fastedge.gcore.dev/`, where `` is the name of your application indicated in the previous step.
If everything is updated correctly, the response will be:
```json theme={null}
{
"Headers": {
"dc": "ed",
"my-custom-header": "Custom-Header-Value",
"geoip-asn": "199524",
"geoip-lat": "49.61130",
"geoip-long": "6.12940",
"geoip-reg": "LU",
"geoip-city": "Luxembourg",
"geoip-continent": "EU",
"geoip-country-name": "Luxembourg",
"geoip-country-code": "LU",
"server_addr": "192.2.3.4",
"server_addrserver_name": "bear-wiggle-4732724.fastedge.gcore.dev",
"connection": "upgrade",
"x-real-ip": "1.2.3.4",
"x-cdn-requestor": "ed-hw-edge-preprod-gc39",
"server_addrx-forwarded-for": "1.2.3.4",
"host": "fastedge.gcore.dev",
"x-forwarded-proto": "https",
"user-agent": "curl/7.81.0",
"cdn-loop": "nb1d2; c=11",
"server_addrpop-country-code": "LU",
"server_addrpop-reg": "LU",
"server_addrpop-country-name": "Luxembourg",
"server_addrpop-lat": "49.6113",
"server_addrpop-long": "6.1294",
"server_addrpop-continent": "EU",
"server_addrpop-city": "Luxembourg"
}
}
```
* my-custom-header: Added custom header
* dc: Data center
* geoip-\*: Client GeoIP data, such as asn, latitude, longitude, region, city, continent, country name, and country code
* server\_addr: PoP IP address
* server\_name: Application hostname
* x-forwarded-for: Client IP address
* pop-\*: PoP GeoIP data, such as asn, latitude, longitude, region, city, continent, country name, and country code
## Troubleshoot an application
If you're having issues with your FastEdge application, see [Troubleshooting](/fastedge/troubleshooting).